Blogger Store

Created for bloggers who want to start an e-commerce or shopping site, Blogger Store is a professional looking template compatible with Paypal or Google Checkout

  • Animated shopping cart
  • Dual dropdown menu bar
  • Automatic featured content carousel
  • Grid and list style post view
Blogger store shopping blogger template

Lightroom Photo Blog Template

A beautiful photo blog template that displays photos in gallery format and is available in two styles basic and advanced

  • Switchable background
  • Attractive theme font
  • Integrated social media icons
  • Left sidebar and navigation menu
Lightroom Photo Blog Template

Magpress

Magazine style theme adapted from wordpress

  • Featured slider section
  • Dual menu bar
  • Tabbed widget
  • 4 column footer
Magpress Magazine style Blog Template

Sens

A simple theme with a clean layout

  • Full width featured slider
  • 4 column footer
  • Social widgets integrated
Sens Blogger template

Pop Out Social Bookmarking Widget

A nice-looking pop out social bookmarking widget that allows readers to share their favorite post easily

  • Neat display
  • Easy to install
Add pop out social bookmarking widget for blogger

Recent Posts with Thumbnails Hack for Blogger edit post

Posted by Bhavika On Wednesday, December 08, 2010 12 comments
recent posts with thumbnails
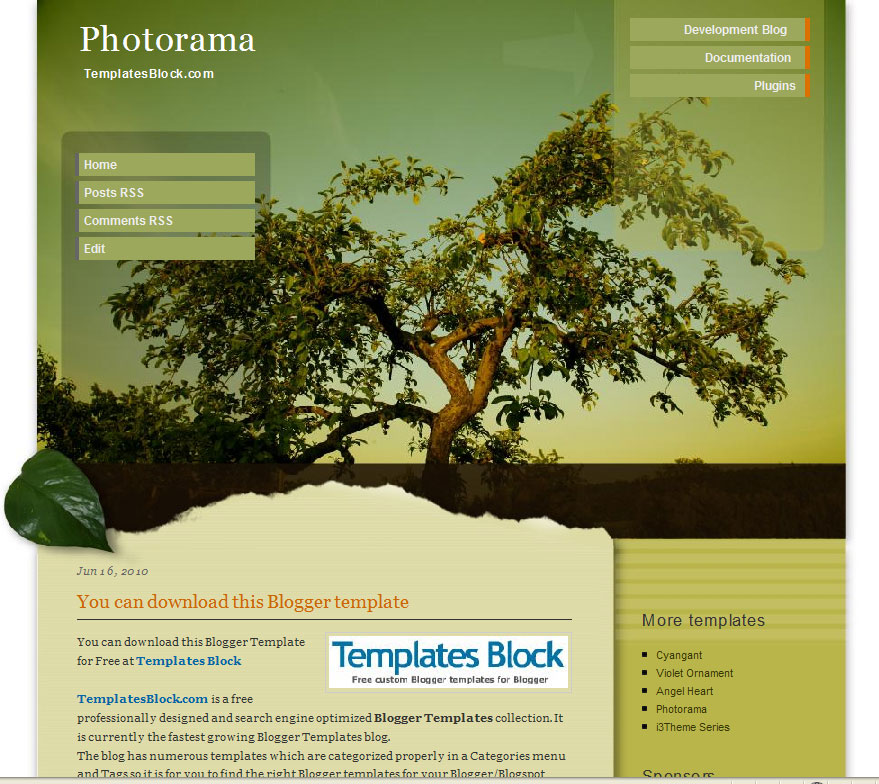
Recent Posts with Thumbnails is an interesting hack that allows you to display your latest posts in various styles. Of course, Blogger has the Recent Posts with Thumbnails gadget, but this hack gives you more flexibility and options to choose from. Another default Recent Posts widget pulls content from your RSS feed and shows only the post titles.

But thanks to Marianne, who was responsible for this Blogger hack, your site can look great.

Before you make any changes, take a backup of your template from Design --> Edit Html.

Then copy paste the below code in Design --> Page Elements section of your blog.
recent posts with thumbnails horizontal
<script language="JavaScript">
imgr = new Array();


imgr[0] = "http://YOURIMAGEURL.jpg";
imgr[1] = "http://YOURIMAGEURL1.jpg";
imgr[2] = "http://YOURIMAGEURL2.jpg";
imgr[3] = "http://YOURIMAGEURL3.jpg";
imgr[4] = "http://YOURIMAGEURL4.jpg";

showRandomImg = true;

tablewidth = 278;
cellspacing = 8;
borderColor = "#ffffff";
bgTD = "#ffffff";

imgwidth = 100;
imgheight = 80;

fntsize = 11;
acolor = "#666";
aBold = true;
icon = " ";

text = "comments";

showPostDate = false;

summaryPost = 75;
summaryFontsize = 11;
summaryColor = "#666";
icon2 = " ";

numposts = 5;

home_page = "YOUR-BLOG-URL";

</script>
<script src="http://fractalblognetwork.com/blogumus/vertical_title_desc_no_comments.js" type="text/javascript"></script>
To run you through the script, you can add your own image url here 'http://YOURIMAGEURL.jpg' for articles without an image. You can add imgr[1] [2] etc., as per your requirement. You can adjust the image size, background colour, post title colour, summary colour, font size, number of posts to be showed and so on in the code. Add your blog url at the place where it is mentioned in the code and at the end of the code there is a javascript file -'http://fractalblognetwork.com/blogumus/vertical_title_desc_no_comments.js' (marked in bold) which can be hosted on your server or any other site.
recent posts with thumbnails and comments
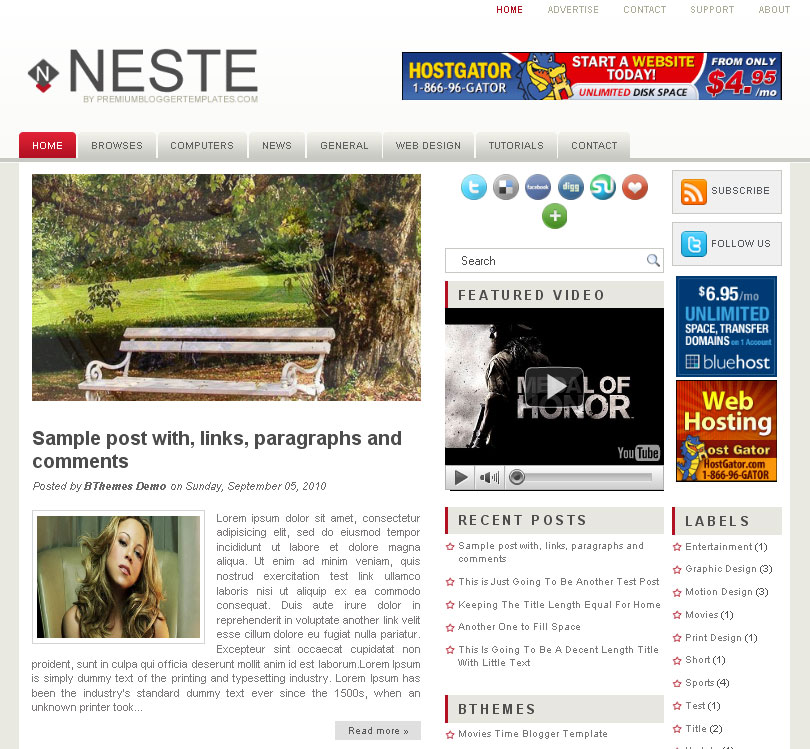
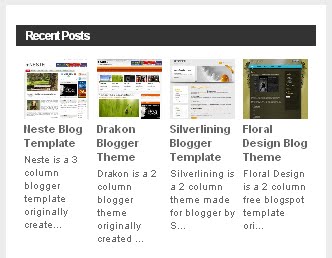
As mentioned earlier this Recent Posts gives you lot of variations in terms of display, for instance you can have horizontal or vertical display, with or without comments, thumbnails with description etc. I have mentioned below the different javascript files available and based on your choice upload it your server or file hosting sites and add the js link in the above code and save the changes.

- Recent posts in horizontal position with only thumbnails
- Recent posts in vertical position with only thumbnails
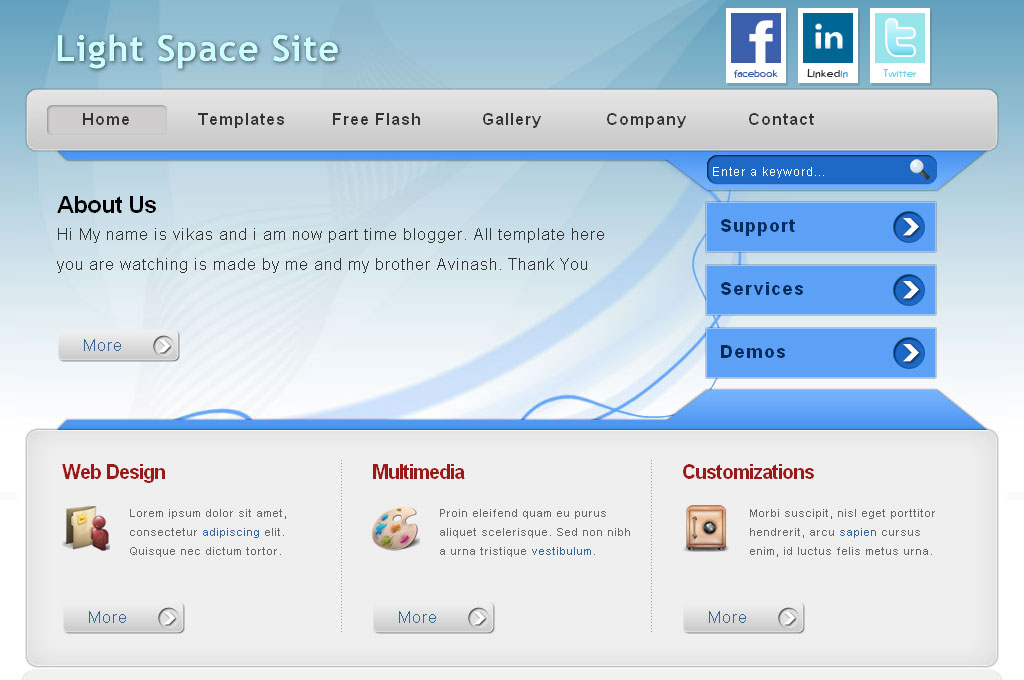
- Recent posts in horizontal position with thumbnails, title, description and comments
- Recent posts in vertical position showing thumbnails, title, description and comments
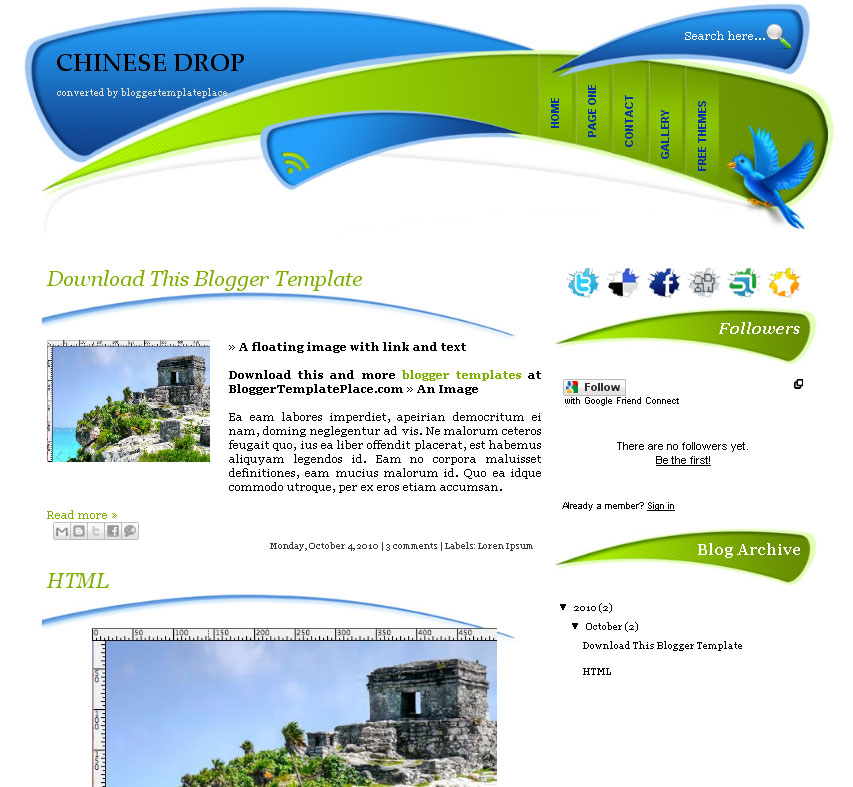
- Recent posts in horizontal position showing thumbnails, title, description and without comments
- Recent posts in vertical position showing thumbnails, title, description and without comments
- Recent posts in horizontal position showing thumbnails with title, description from any particular label
- Recent posts in vertical position showing thumbnails with title, description from any particular label
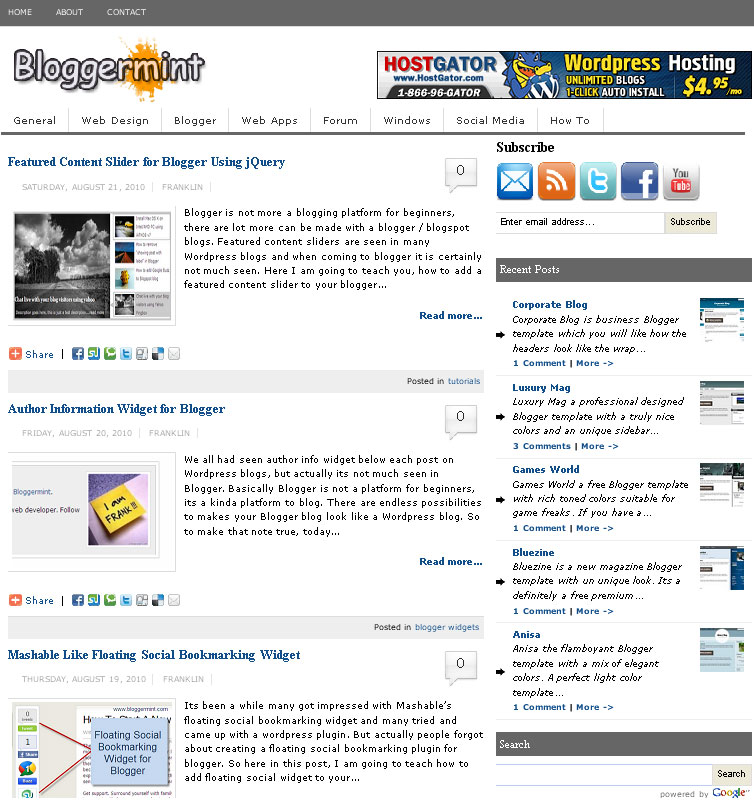
- Recent posts in horizontal position showing thumbnails with title, description in between thumbnails instead of below thumbnail

In case of recent posts with thumbnails from any particular label/tags/categories, insert this line in the above code after -

'home_page = "YOUR-BLOG-URL";'

label = "tagname";

Recent Posts with thumbnails hack certainly enhances the look of your blog!

Neste Blog Template edit post

Posted by Bhavika On Monday, December 06, 2010 5 comments
Neste is a 3 column blogger template originally created by New WP Themes and ported to blogger by Premium Blogger Templates. The theme includes a featured slider, dual menu bar and featured video section.
neste 3 column free blog template
The header space starts off with the horizontal menu bar on top right, followed by the blog logo and the second menu bar below it. You can add your blog logo and title in Page Elements--Edit section, the image size must be 286px width and 68px height.

The main column features the slider to display your top content. Modify the content of the slider from Edit Html and look for the below code -

<div id='myGallery'>

<div class='imageElement'>
<h3>This is featured post 1 title</h3>
<p>Replace these every slider sentences with your featured post descriptions.Go to Blogger edit html and find these sentences.Now replace these with your own descriptions.This theme is Bloggerized by Lasantha - Premiumbloggertemplates.com.</p>
<a class='open' href='SLIDER-1-URL-HERE' title='This is featured post 1'/>
<img alt='' class='full' src='http://2.bp.blogspot.com/_4HKUHirY_2U/TOv2mBgU7hI/AAAAAAAAIOQ/rZFzaRce6ic/s1600/1.jpg'/>
</div>
Replace the text in the code with the post title, description, post link and image, which has to be 480px by 280px. Follow the same steps for each slide and save the changes.

The second column includes a set of social bookmarking icons to facilitate readers to share your content on various social media sites, this is followed by an internal search box and featured video section. While the third column, which is a bit narrow, includes 'Subscribe to feed' and 'Follow on Twitter' option and the default blogger widgets.

Download the Neste Blog Template with slider

Its also available without the slider - Download the Neste Blog Template without the slider

Drakon Blogger Theme edit post

Posted by Bhavika On Saturday, November 27, 2010 6 comments
Drakon is a 2 column blogger theme originally created by Web2Feel and adapted to blogger by Blogger Tip and Trick. Its a magazine style free template featuring dual navigation bar with drop down menu and a neat slider.
drakon 2 column blogger theme
To change the links in the first navigation bar, go to Design--Edit Html and find this code, below it you can add the category links and sub menu links.

<div id='catmenucontainer'>

While for the second menu bar follow the same steps, look for this code and below it you can insert the relevant categories and sub-categories -

<div id='foxmenucontainer'>

The template has a neat slider to showcase your top or featured content in a thumbnail format with post summary below it. To modify the 5 slides, access your Edit Html, and search for this code, this is the code for Slide 1 -

<li>
<div class='mytext'>
<a href='SLIDE-1-LINK-HERE'>
<img class='sidim' src='http://1.bp.blogspot.com/_4HKUHirY_2U/TOZFBzP5MjI/AAAAAAAAH1U/lKMXgEk5D2g/s1600/1.jpeg'/>
</a>
<div class='clear'/>
<h2><a href='SLIDE-1-LINK-HERE'>Slide 1 Title</a></h2>
<p>Go to Blogger edit html and replace these slide 1 description with your own words. ...</p>
</div>
</li>

Follow the instructions given in the code for slide 1 and similarly carry out the steps for remaining slides.

The sidebar on the right includes the internal search box, featured video and the default blogger widgets like Recent Posts etc. You will get more space to display your content as this theme also has a 4 column footer. At the bottom of the template after the footer column there are links to 'Subscribe to RSS' and 'Follow on Twitter', so from Edit Html add your twitter id in the code below and save the changes -

http://twitter.com/USERNAME

Download the Drakon Blogger Theme

Silverlining Blogger Template edit post

Posted by Bhavika On Tuesday, November 23, 2010 5 comments
Silverlining is a 2 column theme made for blogger by Splashy Templates. The highlight of this blogspot template would be the featured section on top to display your favorite post.
silverlining 2 column blogger template
To change the text of the featured post, simply go to Edit Html and search for this code to add your content. However, you will not be able to change the default featured image since the author has included the entire top background area as one image -

<h2>Your.Specials.Here</h2>
<b>Your content here...</b>
<br/>
Aenean leo ligula, porttitor eu, consequat vitae, eleifend ac, enim. Aliquam lorem ante, dapibus in, viverra quis, feugiat a, tellus. <a href='#'>more...</a>

The main column on the right displays posts in a summarised Read More format with the date stamp below the headline and labels, author, comments and default blogger social bookmarking icons at the end of each post.

While the single side column on the left of the template shows widgets separately in a white box. There is also a 3 column footer included in the theme to add widgets of your choice.

Download the Silverlining Blogger Template

Floral Design Blog Theme edit post

Posted by Bhavika On Saturday, November 13, 2010 0 comments
Floral Design is a 2 column free blogspot template originally made by Template Mo and converted to blogger by BloggerTheme.
Floral Design Blog Theme
The template has a nice colour scheme and simple features. Firstly, you can replace the header logo with your own blog image, access Design--Edit Html and search for this line of code and add your image url and tagline -

<img alt='logo' src='http://1.bp.blogspot.com/_-oSBOVNdtsg/TNVQAFNpS8I/AAAAAAAAAOc/1Vj6Z9aaC8s/s1600/templatemo_logo.png'/><span>BloggerTheme.Net</span>

The social bookmarking icons are placed on the right of the header. In order to add your links in Edit Html, find this code and replace '#' with the relevant urls to your facebook, twitter etc.

<ul id='social_box'>
<li><a href='#'><img alt='facebook' src='http://1.bp.blogspot.com/_-oSBOVNdtsg/TNPYoHLHQLI/AAAAAAAAACo/cLqLcQL5KK8/s1600/facebook.png'/></a></li>
<li><a href='#'><img alt='twitter' src='http://4.bp.blogspot.com/_-oSBOVNdtsg/TNPZD0vTq3I/AAAAAAAAAFg/bPU9bVwqGSk/s1600/twitter.png'/></a></li>
<li><a href='#'><img alt='linkin' src='http://1.bp.blogspot.com/_-oSBOVNdtsg/TNPYohGNKCI/AAAAAAAAADA/BDlnXEv2CKk/s1600/linkedin.png'/></a></li>
<li><a href='#'><img alt='flickr' src='http://4.bp.blogspot.com/_-oSBOVNdtsg/TNPYoO6moKI/AAAAAAAAACw/W5NDgOKWqvE/s1600/flickr.png'/></a></li>
<li><a href='#'><img alt='myspace' src='http://1.bp.blogspot.com/_-oSBOVNdtsg/TNPYtnb1ICI/AAAAAAAAADQ/thUdGXI-ZDI/s1600/myspace.png'/></a></li>
</ul>

The categories can be displayed in the horizontal navigation bar, which is followed by the main post area. Post details like author, time, labels and and appear below the headline, while the comments are integrated with gravatar.

While the single sidebar on the right and the 3 column footer space at the bottom can be used for recent posts, comments, archives, labels etc.

Download the Floral Design Blogspot Template

Modern Photography Blog Theme edit post

Posted by Bhavika On Monday, November 08, 2010 2 comments
Modern Photography is a free 2 column blogger theme created by Bloggermint. The main highlight of this template is the cool slider where photographers can display their work.
Modern Photography Blog Theme
After you download and upload this blogger template you can proceed to inserting your blog name and tag line from Settings--Basic.

The horizontal menu bar can be used to display your categories, followed by the slider. To change the images in the slider go to Design--Edit Html and search for this code -

<div class='scrollableArea'>

Modify the image links below that code with your own urls and save the changes, image size can be around 497px × 330px. The main post column appear in the standard format - date, author, labels come below the headline, and comments, default blogger social bookmarking buttons are at the end of the post.

Modern Photography template also comes with a three column footer to display more content.

Download the Modern Photography Blog Theme

CSS Heaven I Blogspot Template edit post

Posted by Bhavika On Thursday, November 04, 2010 6 comments
CSS Heaven I is a lovely 3 column theme made by Free CSS Template and ported to blogger by Templates Novo Blogger.
I liked the layout and colour scheme of this blog template; its neat and compact. Lets get into the details of it - the blog title and search box are above the horizontal menu bar, while below it comes the header image of 980x170 pixels, if you want to change it, simply go to Edit Html and look for the below image url ans replace it with your own -

http://1.bp.blogspot.com/_YGpl3rQPSzI/TMWblhgML8I/AAAAAAAAQtk/1lZ9qYxNyT4/s1600/header.jpg
Now in the main column summarized posts appear automatically with thumbnail images and link to read the complete article. When you click on the post, it becomes a 2 column template with the single sidebar on the right, that features your blogger profile, search box and recent posts from the home page.

Lastly, this theme also includes a footer column to display 'About Me' or 'About the Blog' and other blogger widgets of your choice.

Download the CSS Heaven I Blogspot Template

Light Space Blogger Template edit post

Posted by Bhavika On Thursday, October 21, 2010 5 comments
Light Space is a 3 column magazine-style template designed by Template Mo and converted to blogger by Best Theme.
lightspace corporate business blog template


The social bookmarking icons have been included right on top in the header space, you can modify the links from Edit Html. Simply look for this code -

<ul class='social_network'>
<li><a href='http://www.facebook.com/Your User Name'

Insert your facebook username and save the template, similarly, add your link for Twitter and Linkedin. The space below the horizontal menu bar is divided into two sections, one side you can include the company profile or about us and the other side is the vertical menu bar to display your services, support and so on.

This theme also features a middle bar to showcase additional categories or sections. In order to modify the default text, go to Edit Html and search for this code -

<div class='section_w940'>
<div class='box margin_r30 box_border'>
<h2>Web Design</h2>
<div class='box_image_wrapper'>
<img alt='product 1' src='http://4.bp.blogspot.com/_yPlAAAH9bEo/TEpZZLwvGaI/AAAAAAAADaQ/cYZPZTwoyAs/s1600/folder.png'/>
</div>

Change the text at relevant spots and save the template. Follow the same steps to edit other 2 sections. Below this are customisable banner ads of different sizes.
lightspace blogspot business theme
While in the main column, each post appears in a summarised manner with thumbnails and Read More links. A good feature of this blogger template is the inbuilt related post widget, along with the author box, where you get to display information about the author/writer.

The sidebar includes the Subscribe to email option and social media sites. You can utilise the remaining space to add blogger widgets, videos etc.

Download the Light Space Blogger Template

Page Navigation Hack for Blogger edit post

Posted by Clyde On Thursday, October 07, 2010 10 comments
page navigation for bloggerBlogger has had this boring, older post, newer post and home links at the bottom of the page since ages. Many of us have already replaced it with a cool numbering system at the bottom of the page known as page navigation. Please back up your template before proceeding with this hack!

This hack has been given to us by Abu Farhan, not only has he taken the time to give us a hack, he has given us six different designs that we can have to use this hack.

Page Navigation Design 1
Page Navigation Design 2
Page Navigation Design 3
Page Navigation Design 4
Page Navigation Design 5
Page Navigation Design 6

Once you have chosen the design, click on the design number and download the zip file. In the zip file you will find a text file with code. Copy that code, go to your blogger dashboard, design, edit html and look for

]]></b:skin>


Paste the design code before this. You can save your template, your not done yet after that there are a few more steps to do.

Now look for
<b:section class='main' id='main' showaddelement='yes' >
<b:widget id='Blog1' locked='true' title='Blog Posts' type='Blog'/>
</b:section>


Once you find that, add this script below it. The script is in the text file in a zip folder, there are only two lines that you can edit.

Namely,

var pageCount=10;
var displayPageNum=6;

Where 10 is the number of posts on each page you would like to show and 6 is the number of pages you would like to show.

Once thats done, save your template and proceed to the final step.

If you do not have a label gadget on your blog add a label gadget by

Layout –> Page Elements –> Add Gadget –> Select Labels

Then go back to your Edit HTML and look for the code below

<a expr:dir='data:blog.languageDirection' expr:href='data:label.url'><data:label.name/></a>


Once you find that code replace it with the code given here.

Save your changes and take a look at your blog with page navigation enabled!

Chinese Drop Blog Template edit post

Posted by Bhavika On Thursday, October 07, 2010 14 comments
Chinese Drop is a 2 column skin ported to blogger by Blogger Template Place. Its got a cool design with a simple layout.
Chinese Drop free blog template
The header includes the menu bar with the categories displayed vertically, a twitter icon besides it and subscribe to RSS button is placed below it. In the main column the posts appear in a summarized 'Read More' format and has the default blogger social bookmarking widget integrated in the theme, whereas the post details - date stamp, labels, comments - are at the end of the post.

The single sidebar features a set of social bookmarking icons so your readers could follow your blog and share content on different sites. In order to modify the links, go to Edit Html and look for the following code -

<div id='sidebar'>
<div class='addthis_toolbox'>
<div class='custom_images'>

Below this you can add your facebook, twitter, delicious etc. links or even change the icons if you like. Then you can choose the blogger widgets to be displayed in the sidebar.

Download the Chinese Drop Blog Template

Hide Ads on a Particular Post or Page edit post

Posted by Clyde On Monday, September 27, 2010 3 comments
Hide ads on blogger postThis was a hack that I always wanted for a long time, especially since most of us have our ads under the headlines of the post which is a very very hot spot :) It does look ugly to an extent and sometimes you would like a particular post or page to look neat, like a contact page or a page displaying some particular art work you would like to sell.

No one had a hack on blogger until recently Geek Blogger came up with one on his best how to blogger.

First, your gonna have to back up your template prior to making any changes. Then the next step is to locate your ad code. Once you have your ad codes you need to put a div code as shown below.

<div id="MyAds1">
Your Ad Code is Here
</div>


Once that is done you can save your template and then go to the post where you would like to hide the ads, at the end of the post paste the code below.

<script type="text/javascript">

var Ads1 = document.getElementById('MyAds1');

Ads1.parentNode.removeChild(Ads1);

</script>


If you have more than one ad on your page then you can hide the one on top as this method does not work to hide two ads. I do hope you liked our second hack from Blogger Blog Templates. Subscribe to get the next hack delivered to your email!

Evander Blogspot Template edit post

Posted by Bhavika On Wednesday, September 22, 2010 4 comments
Evander is a 2 column blogspot theme designed by Web2Feel and the blogger version is brought to us by BestTheme.
Evander Blogspot Template
The highlights of this template are a nice slider,
social bookmarking icons and recent post thumbnail widget.
The slider images appear on a MAC screen with the headline and a brief post summary. You can activate the slider from Design-Edit Html and look for the below code -

<div id='slidearea'>
<div id='gallerycover'>
<div class='mygallery'>
<ul>
<li>
<a href='#Post url'>
<img alt='' class='slimg' src='http://3.bp.blogspot.com/_MkGBVwDEF84/TJQk-8RNHEI/AAAAAAAAFWU/keGA9OoAyS8/s1600/1.jpg'/>
</a>
</li>

Add your post and image url at relevant spots and save the changes. Below the slider is the horizontal menu bar, you can edit that from Design--Page Elements, edit Link list and post the relevant menu links. The main column is on the right where each post appears in a summarised format with 'Read More' link to the post at the bottom.

This theme comes with social bookmarking icons installed at the top of the right sidebar and below it is the recent posts with thumbnails widget. Change the link from Edit Html, find the below code and replace it with your blog link -

home_page =

&quot;http://www.besttheme.net/&quot;;
</script>

You can also edit the number of post shown there by changing numposts. While for Recent Comments, follow the same steps from Edit Html find the below code and change the url to your blog link -

script src='http://www.besttheme.net/feeds/comments/default?alt=json-in-script&amp;callback=showrecentcomments'/>

Download the Evander Blogspot Theme

Novinture Blogspot Theme edit post

Posted by Bhavika On Wednesday, September 15, 2010 2 comments
Novinture is a magazine style 2 column blogspot theme created by CamelGraph and converted to blogger by Blogger Tricks.
Novinture Blogspot Theme

The template has a clean layout and includes several blogger features, lets go through some of them. Below the header image is the slideshow that displays featured posts along with the thumbnails at the side, the headline and description. Initially make post images of the size 490px X 298px and smaller size ones of 67 x 67, upload them on image-hosting site and go to Edit Html. Search for the following code -

<!-- Featured Area -->
<div id='featured-area'>
<div class='pics' id='s1'>

<!-- FIRST SLIDE START -->

<div>
<img height='298' src='http://1.bp.blogspot.com/_Toi-rh0Nm00/TBKDEGTEXPI/AAAAAAAAE98/phkrfsHh96g/s1600/slide1.jpg' width='490'/>
<div class='excerpt'>
<p><a href='http://www.bloggertricks.com'>This is First Slide Title</a></p>
<p class='excerpt-text'>Description of first Slide goes here.Vestibulum ante ipsum primis in faucibus orci luctus et ultrices posuere cubilia Curae...</p>
</div>
<a href='http://www.bloggertricks.com'><span class='feat-overlay'/></a>
</div>

<!-- FIRST SLIDE END -->

<!-- SECOND SLIDE START -->

<div>
<img height='298' src='http://4.bp.blogspot.com/_Toi-rh0Nm00/TBKDE7agsII/AAAAAAAAE-M/N62Z4KP9cdo/s1600/slide+2.jpg' width='490'/>
<div class='excerpt'>
<p><a href='http://www.bloggertricks.com'>This is Second Slide Title</a></p>
<p class='excerpt-text'>Description of second Slide goes here.Vestibulum ante ipsum primis in faucibus orci luctus et ultrices posuere cubilia Curae...</p>
</div>
<a href='http://www.bloggertricks.com'><span class='feat-overlay'/></a>
</div>

<!-- SECOND SLIDE END -->


<!-- THIRD SLIDE START -->

<div>
<img height='298' src='http://4.bp.blogspot.com/_Toi-rh0Nm00/TBKDFUUGcTI/AAAAAAAAE-c/BzLyqq47Vn0/s1600/slide+3.jpg' width='490'/>
<div class='excerpt'>
<p><a href='http://www.bloggertricks.com'>This is Third Slide Title</a></p>
<p class='excerpt-text'>Description of thrid Slide goes here.Vestibulum ante ipsum primis in faucibus orci luctus et ultrices posuere cubilia Curae...</p>
</div>
<a href='http://www.bloggertricks.com'><span class='feat-overlay'/></a>
</div>

<!-- THIRD SLIDE END -->

</div>

<div id='slider-control'>
<div class='featitem active'>

<!-- Enter the FIRST thumbnail image URL (67 x 67 px) below -->
<img src='http://4.bp.blogspot.com/_Toi-rh0Nm00/TBKDEmdlTCI/AAAAAAAAE-E/mM_b70WY7xI/s400/slide+1+t.jpg'/>
<span class='order'>1</span></div>


<div class='featitem '>

<!-- Enter the SECOND thumbnail image URL (67 x 67 px) below -->
<img src='http://2.bp.blogspot.com/_Toi-rh0Nm00/TBKDFJW1a7I/AAAAAAAAE-U/sYfdAeC_BMU/s400/slide+2+t.jpg'/>
<span class='order'>2</span></div>


<div class='featitem '>

<!-- Enter the THRID thumbnail image URL (67 x 67 px) below -->
<img src='http://1.bp.blogspot.com/_Toi-rh0Nm00/TBKDJA1YimI/AAAAAAAAE-k/hJT63EfCXjs/s400/slide+3+t.jpg'/>
<span class='order'>3</span></div>

</div>
<!-- end slider-control div -->
<div class='clear'/>
</div>
<!-- end featured area -->

Replace the jpg links with your image urls, add the post titles, descriptions of each slide (wherever indicated) and save the changes. Your slideshow should be up and running!

Novinture displays automatic thumbnails on homepage and automatic post summaries. Making it easy for the readers to share the post on social networking sites, each post has the Facebook share button and Retweet button adjacent to the thumbnail.

Also enabled in this template is the page navigation feature, which many bloggers are opting for. The single sidebar on the right shows the RSS feed subscription box, an inbuilt search box and the default blogger widgets. That's not it there is also 4 column footer to allow you to put up various widgets.

Download the Novinture Blogspot Templates

Blogumus, the Flash Tag Cloud is Back edit post

Posted by Clyde On Tuesday, September 14, 2010 37 comments
blogumus the flash tag cloudOver two years ago Amanda from Blogger Buster ported the wordpress cumulus tag cloud to blogger, this flash based tag cloud was and perhaps still is the best tag looking tag cloud for blogger.

Unfortunately this tag cloud stopped functioning for over 6 months, after numerous comments and emails the tag cloud is still non functional.

But today Blogger Blog Templates is giving you a permanent solution for your blogspot flash tag cloud. If you would like to see how it looks take a look at the tag cloud in the sidebar.

Firstly you would require to download two files, right click on the links below and save target as.

swfobject.js

blogumus.swf

Now that you have these two files, upload it on your hosting account and then save the links.

Go to your blogger dashboard -> design -> edit html

Once your there first back up your template.

Now expand widgets and look for this line:

<b:section class='sidebar' id='sidebar' preferred='yes'>


Immediately after this line paste the code given below, though in some templates you may not be able to paste it immediately and will have to scout for a spot where you don't get an error.

<b:widget id='Label99' locked='false' title='Labels' type='Label'>
<b:includable id='main'>
<b:if cond='data:title'>
<h2><data:title/></h2>
</b:if>
<div class='widget-content'>
<script src='Your swfobject.js Link Comes Here' type='text/javascript'></script>
<div id='flashcontent'></div>
<script type='text/javascript'>
var so = new SWFObject("Your blogumus.swf Link Comes Here", "tagcloud", "240", "300", "7", "#ffffff");
// uncomment next line to enable transparency
//so.addParam("wmode", "transparent");
so.addVariable("tcolor", "0x333333");
so.addVariable("mode", "tags");
so.addVariable("distr", "true");
so.addVariable("tspeed", "100");
so.addVariable("tagcloud", "<tags><b:loop values='data:labels' var='label'><a expr:href='data:label.url' style='12'><data:label.name/></a></b:loop></tags>");
so.addParam("allowScriptAccess", "always");
so.write("flashcontent");
</script>
</div>
</b:includable>
</b:widget>


Once you insert this code you need to replace the two links in the code with your own hosting links

Your swfobject.js Link Comes Here

Your blogumus.swf Link Comes Here

Once you change those links you can preview the template, the blogumus widget should appear in your sidebar.

This is very important, if you have an apostrophe or quote character (' or ") in your labels, the tag cloud appears blank.

Certain features of blogumus can be customized:

The width, height and background color can be change from the line below that you will find in the code

"tagcloud", "240", "300", "7", "#ffffff");


where 240 = width, 300 = height and ffffff = back ground color

but you can also have a transparent background where the labels float on your current blog background

look for
//so.addParam("wmode", "transparent");


and remove the
//
and your blogumus will be transparent

if you want to change the text color of the labels look for

so.addVariable("tcolor", "0x333333");


change the 333333 to a color of your choice

if you want to change the text size look for

values='data:labels' var='label'><a expr:href='data:label.url' style='12'>


and change the value 12 to a font size you prefer

if you want to change the speed of the tag cloud rotation, look for

so.addVariable("tspeed", "100");


change the value 100 to what you like

We do hope you can finally get your blogumus tag cloud working again, hope to see you soon! A special thanks to DualTranz for bringing back this widget to life!

Cameo, the Photo Blogger Template edit post

Posted by Bhavika On Thursday, September 02, 2010 4 comments
Cameo is a 3-column photo blog theme designed by Patrick Sy and converted to blogger by Best Theme.
Cameo, the Photo Blogger Template
The template uses a dark colour scheme and plays with light and shadow effect to highlight the images. The header space is utilised for the search box on the extreme right, the blog title along with description and the drop-down menu bar below it. To change the menu links, go to Design--Edit Html and look for this code -

<!-- begin top menu -->
<div class='navIndex'>
<div class='nav'>
<ul>
<li class='current_page_item'><a expr:href='data:blog.homepageUrl' title='Home'>Home</a></li>
<li class='page_item'><a href='#' title='Menu #1'>Menu #1</a></li>
<li class='page_item'><a href='#' title='Menu #2'>Menu #2</a>
<ul>
<li class='page_item'><a href='#' title='Sub Menu #1'>Sub Menu #1</a></li>
<li class='page_item'><a href='#' title='Sub Menu #2'>Sub Menu #2</a></li>
<li class='page_item'><a href='#' title='Sub Menu #3'>Sub Menu #3</a></li>
</ul>
</li>
</ul>
</div>
</div>
<!-- end top menu -->
Add the relevant links in the above code. The featured image that appears in a frame below the menu bar, is 900px×310px. In order to change that access Edit Html and look for the following code -

<!-- begin featured image -->
<div id='mBodyHead'>
<div class='wrapper'>
<a href='#' title='Hello world!'><img alt='mainImage' class='attachment-900x9999 wp-post-image' height='310' src='http://www.opendrive.com/files/6803598_GZuBx/mainImage.jpg' title='mainImage' width='900'/></a>
<div class='featureTag'/>
</div>
</div>
<!-- end featured image -->

Change the links at the relevant spots, replace the default opendrive image with your url, add the post url etc. In this template the latest posts are displayed in a thumbnail format with the date stamp, comment and automatic Read More link. On mouse hover the summary gets highlighted, which gives a nice visual effect.

Cameo blog theme also features a widget-ready single sidebar. The links can be edited from Edit Html and you need to look for this code, and add your links right after that -

<!-- begin sidebar menu -->
<div class='sideBar'>
<h3>Navigation</h3>
<div class='box'>
<ul>

This theme also includes 4-column footer where you can place additional blogger widgets.

Download the Cameo, the Photo Blogger Template

Bloggermint, a Premium Blogger Template edit post

Posted by Bhavika On Thursday, August 26, 2010 21 comments
Bloggermint is a premium theme designed by Franklin Manuel. Its a 3 column template with a clean layout and some cool features, which are easy to customize.
bloggermint premium blogger template
The template consists of a dual navigation bar, which is above and below the header. In order to change the links in the topmost menu bar, go to Design--Edit Html and look for the following code -
<ul id='nav1'>

You can add the links to your Home page, contact etc. While the second menu bar below the header image, has a sub-menu to display categories etc. To change the default links, go to Design--Edit Html, search for this code and add your links in the code below this one -
<ul id=’nav2&#8242;>

While in the main column, each post appears automatically in a summarized format with social bookmarking icons at the end of it and an author info widget. In order to edit the text in the author box, access Edit Html and find this code -
<div class='author_info'>

Change the text to what you desire, along with the image link - http://i50.tinypic.com/iw7lec.jpg, create an image with the size 130×130 pixels. Each post also has Facebook and Twitter share button below the headline. To replace the default code with your id, go to Edit Html, expand the template and search for and replace bloggermint with your twitter id -

data-via=’bloggermint’

Bloggermint also includes page numbered navigation. The sidebar has the Subscribe option (Facebook, Twitter, RSS, email and YouTube), you can modify the links in Edit Html, just look for the below code -

<h3 style=’margin-bottom:10px;’>Subscribe</h3>

This is followed by Recent Posts with thumbnails widget, default search box, Archives etc. Overall Bloggermint is lovely theme, can be used for a blog/site with multiple topics, professional blog etc.

Download the Bloggermint, a Premium Blogger Template

Gamecraft, the Gaming Blogger Theme edit post

Posted by Bhavika On Wednesday, August 25, 2010 0 comments
After a long time we have a gaming template. Gamecraft is designed by Jinsona Theme and brought to blogger by Cahayabiru.com.
Gamecraft, the Gaming Blogger Theme

Its a 3-column theme which consists an automatic slider, a scroll bar adjacent to it, dual navigation bar and tabber. Let's start with the menu bars, each above and below the header. The first one features a drop-down menu, so you can include all your sections. To activate that, go to Design--Page Elements, click on Edit 'categorymenu' and add the below code -

<li><a href="PARENT-LINK-ADDRESS">PARENT TITLE</a>
<ul class="children">
<li><a href="CHILDREN-LINK-ADDRESS">CHILDREN TITLE</a></li>

<li><a href="SUB-PARENT-LINK-ADDRESS">SUB PARENT TITLE</a>
<ul class="children">
<li><a href="CHILDREN-LINK-ADDRESS">CHILDREN TITLE</a></li>

</ul></li></ul>
</li>

<li><a href="PARENT-LINK-ADDRESS">PARENT TITLE</a>
<ul class="children">
<li><a href="CHILDREN-LINK-ADDRESS">CHILDREN TITLE</a></li>
</ul></li>

Repeat the code marked in bold in case you want to add more categories.

To add links in the second menu bar, go to Design--Page Elements, click on Edit 'frontmenu' and add the following code -

<li><a href='top-menu-link-address-here' title='hover-top-menu'>YOUR-TOP-TITLE</a></li>

Place the relevant links and save the changes. For the main slider, go to Design--Page Elements, click on Edit 'big picture slidearea', add the following code with your links -

<div id="feature-1" class="videoid"><a href="YOUR-POST-LINK"><span class="shade"></span></a><img class="slidim" src="IMAGE-LOCATION-HERE" width="630" height="280" alt="" /></div>
<div id="feature-2" class="videoid"><a href="YOUR-POST-LINK"><span class="shade"></span></a><img class="slidim" src="IMAGE-LOCATION-HERE" width="630" height="280" alt="" /></div>
<div id="feature-3" class="videoid"><a href="YOUR-POST-LINK"><span class="shade"></span></a><img class="slidim" src="IMAGE-LOCATION-HERE" width="630" height="280" alt="" /></div>
<div id="feature-4" class="videoid"><a href="YOUR-POST-LINK"><span class="shade"></span></a><img class="slidim" src="IMAGE-LOCATION-HERE" width="630" height="280" alt="" /></div>
<div id="feature-5" class="videoid"><a href="YOUR-POST-LINK"><span class="shade"></span></a><img class="slidim" src="IMAGE-LOCATION-HERE" width="630" height="280" alt="" /></div>

For the mini automatic slider with images and post description on the right, you need to add another code in Design--Page Elements, edit 'Small picture right tab' -

<li><a class="listab rounded" href="#feature-1"><img class="boximage" src="YOUR-IMAGE-URL" width="100" height="70" alt="" /><h3> TITLE-HERE</h3><p> SHORT-DESCRIPTION-HERE. ... </p></a></li>
<li><a class="listab rounded" href="#feature-2"><img class="boximage" src="YOUR-IMAGE-URL" width="100" height="70" alt="" /><h3> TITLE-HERE</h3><p> SHORT-DESCRIPTION-HERE. ... </p></a></li>
<li><a class="listab rounded" href="#feature-3"><img class="boximage" src="YOUR-IMAGE-URL" width="100" height="70" alt="" /><h3> TITLE-HERE</h3><p> SHORT-DESCRIPTION-HERE. ... </p></a></li>
<li><a class="listab rounded" href="#feature-4"><img class="boximage" src="YOUR-IMAGE-URL" width="100" height="70" alt="" /><h3> TITLE-HERE</h3><p> SHORT-DESCRIPTION-HERE. ... </p></a></li>
<li><a class="listab rounded" href="#feature-5"><img class="boximage" src="YOUR-IMAGE-URL" width="100" height="70" alt="" /><h3> TITLE-HERE</h3><p> SHORT-DESCRIPTION-HERE. ... </p></a></li>

Fill in your links at relevant spots and save the changes. While in the main post area, post details like author, date, comments appear at the end of the post. The sidebar includes a tabber that can be customised. Access Design--Edit Html and search for 'EDIT-ME' and add the links you want to display in the tabber, like Recent Posts, Comments ets.

Gamecraft has a decent layout with nice features, although it can take time to load due to the number of images and javascripts. Another gaming theme you might be interested in is Gamezine Template.

Download the Gamecraft Gaming Blogger Theme

Work-a-holic Blogspot Theme edit post

Posted by Bhavika On Friday, August 20, 2010 2 comments
Work-a-holic is a 3 column theme designed by Graph Paper Press and brought to blogger by Anshul. It primarily focuses on showcasing photos or designs of bloggers, illustrators, designers etc. 

The theme has a minimalistic and neat layout with easy navigation for users. The menu bar is adjacent to the blog title, and the search box is placed on extreme right. You can include a welcome message for your readers, which is above the main post area, and next to it is the Twitter widget showing your latest update. To activate Twitter, go to Design--Edit Html and look for the below code and replace it with your username -

YOUR-TWITTER-USERNAME

The 3-column photo gallery automatically displays image from your post with the headline and labels. Also included in the template are the social bookmarking icons under each post. The right sidebar can be used to display your recent photos or labels.

Work-a-holic also has a 3 column footer, appearing only on the home page, that is completely widgetized. It simply gives you extra space to add more features on your photo blog.   

Download the Work-a-holic Blogspot Theme

Jeans Blogspot Template edit post

Posted by Bhavika On Monday, August 02, 2010 2 comments
Jeans blogger template is designed by Template Mo and converted to blogger by Best Theme. Its a 3-column template that includes summarised posts on home page, sliding gallery and footer space.
Jeans blogger template
The blog title is in the middle of the menu bar on top, on the label of the jeans. Below that there is a broad space to write either an introductory note, a welcome message or anything else.

The main post area is divided into 3 columns to display summaries of each post with a Read More link to the complete article, and on entering the post author name and date stamp shows up after the headline, while the labels and comments come at the end of the post.

An interesting feature of this template is the sliding photo gallery at the bottom, you can add 100x100 image and link it to your post. To activate this feature, go to Edit Html and look for the below code -

<div id='SlideItMoo_items'>
<div class='SlideItMoo_element'>
<a href='#'>

<img alt='css template' src='http://1.bp.blogspot.com/_yPlAAAH9bEo/TFMEvsZVqtI/AAAAAAAAD_c/DWr7U8m-LBg/s1600/templatemo_image_03.jpg'/></a>
</div>

Change the links at the relevant spots and save it. There is a 4-column footer space as well for you to add blogger widgets etc.

Download the Jeans Blog Template

Viewport, a Unique Blogger Theme edit post

Posted by Bhavika On Friday, July 30, 2010 2 comments
Viewport is a pretty unique 2 column theme converted by Wordpress to Blogger. The template basically displays your blog posts in a picture format, so it instantly captures your readers attention.
viewport blogger theme The layout of this theme is neat and simple. The blog title on top, followed by the menu bar, which also includes the RSS subscribe icon, and the search box on the extreme right. The post area is in the form of a slider, that shows a fairly big image (940 x 600 pixels), the headline appears on top and the post summary at the bottom right corner. On clicking the headline, readers will be taken to the post page.

To put up your posts, go to Posting--New Post and add the below code -

<img class="homeimage" src="IMAGE URL" alt="" width="940" height="600" />
<img class="singleimage" src="IMAGE URL" alt="" width="940" height="300" />
<div class="entry">POST</div>

For home image, you need to add class="homeimage" and for a single image, put class="singleimage".

On entering the post, the image will automatically display in a banner format, then comes a box with your post details - the date stamp, labels and comments. The theme is really cool, the relevant posts in labels and archives also appear in a sliding panel, in a small box frame. Additional instructions are given in the download folder.

The right hand sidebar, that shows up on entering a post, includes the previous and next post along with different blogger widgets. Its a great theme to use for a professional or a photo blog, to make a presentation, display creative work etc.

Download the Viewport Blogger Theme

Doggy Love Blogspot Theme edit post

Posted by Bhavika On Thursday, July 15, 2010 0 comments
If you are a dog lover just like me, then here's a blog template for you to write down all the cute things your pet does. Doggy Love is a 3 column theme designed by TemplateLite and ported to blogger by Anshul.
Doggy Love Blogspot Theme
Its got a cute header image of the dog and a comment box, where the blog title and one line description will appear. Below that is the search section and an interesting menu bar. You can add the categories in Edit Html, search for the below code and replace # with your links and Page 1 etc with your text.

<div id='menu'>

In the main column the headline appears on a bone along with the date stamp on the extreme right. Whereas the labels and comments come at the end of the post. This theme comes with 2 sidebars, so there is enough space to add blogger features and widgets of your choice.

Download the Doggy Love Blogspot Theme

Monetizing Your Blogger Part 2 edit post

Posted by Clyde On Friday, July 09, 2010 0 comments
Now that we learn't how to place ads in blogger in the previous video, Monetizing Your Blogger Part 1, we take you a step forward. We show you an additional channel of making money and also teach you how to make more money from your ad space.

Since the youtube limit is only 10 minutes per video, this episode has been broken down in to two parts. I also mentioned in the next video, we will look at SEO and Traffic, but I forgot to mention one important stream of generating revenue online, Affiliate Marketing.


In this video we have used the Kontera ad network and the AdsDaq advertisement network. You can also read this old article on how to rotate ads with adsdaq for more help.

Tea Time Blogspot Skin edit post

Posted by Bhavika On Tuesday, July 06, 2010 18 comments
Tea Time is a lovely blog skin designed and coded by Ezwpthemes. Its a 2 column theme that can be used for book, food or drinks blog.
tea time blogger template
It has an extended header image that includes several features. The blog name appears on a suspended placard, followed by the menu bar and a small welcome note for your readers, you can add text there from Design--Page Elements and click on edit 'About'. The menu bar can be changed from Design-Page Elements, click on edit top tabs and add your links.

To the right of the header is Recent Posts and Recent Comments that can be activated from Design--Page Elements, and below that is the internal search box. The RSS icon has been placed at the side of the main column, you need to add the blog feed url in Edit Html.

The main post area is quite different as compared to other blog designs. It starts with the headline, followed by the author name, labels and at the end of the post you have social bookmarking icons so readers can tag your post on other social networks. Below this the comments appear on a menu card, that looks quite neat and adjacent to comments is the date stamp.

While the sidebar on the right side of the diary is to display blogger widgets like Categories, Archives and much more.

Download the Tea Time Blogspot Skin

Photorama Blog Theme edit post

Posted by Bhavika On Sunday, July 04, 2010 6 comments
Photorama is a 2 column template created by Templates Block. Its a simple photo blog theme.
Photorama Blog Theme
Photorama has a nice and broad header image, which includes dual navigation bar around the blog title. In order to add your links go to Design-Edit Html and search for the following code -

<ul class='upperright'>
<li><a href='#'>Development Blog</a></li>
<li><a href='#'>Documentation</a></li>
<li><a href='#'>Plugins</a></li>
</ul>

<ul class='upperleft'>
<li><a expr:href='data:blog.homepageUrl'>Home</a></li>
<li><a expr:href='data:blog.homepageUrl + &quot;feeds/posts/default&quot;'>Posts RSS</a></li>
<li><a expr:href='data:blog.homepageUrl + &quot;feeds/comments/default&quot;'>Comments RSS</a></li>
<li><a href='#'>Edit</a></li>
</ul>

Replace all the # with your url, and all the categories like Development Blog, Documentation etc with relevant titles.

This template doesn't include a photo gallery, so the rest of the layout is like the regular blogger template. The main column starts off with the date stamp, followed by the blog title and other post details come at the end of the post.

The sidebar on the right can be used to add other blog widgets like Recent Posts, Archives, Comments etc.

Download the Photorama Blog Theme

Natural Paper Blogspot Template edit post

Posted by Bhavika On Sunday, July 04, 2010 0 comments
Created by Dynamic WP and made available on blogger by Blogger Template Place, Natural Paper is a 2 column blogspot theme that can be used either for a nature or a personal blog.
Natural Paper Blogspot Template
Its got a catchy header space with the leaves and a transparent menu bar to display your categories. On the extreme right is the green RSS feed icon and below that your blog title will appear.

The look of the 2 columns is in the form of a diary page, so the main column has the author name, date stamp and comments below the headline and labels at the end of the post. Read More feature is also incorporated in the theme.

The single sidebar on the left includes the default blogger widgets and you can add more gadgets of your choice. The single column also has the Subscribe to Feed option. Overall. Natural Paper is a decent template with a simple layout.

Download the Natural Paper Blogspot Template

Sevim Blogger Theme edit post

Posted by Bhavika On Thursday, June 24, 2010 15 comments
Sevim is a professional looking theme created by Newwpthemes and ported to blogger by Besttheme.
Sevim, professional Blogger Theme
Its a 2 column blogger template with dual menu bars, each above and below the header. Next to the blog logo there is space for a banner ad. One of the features of this theme is the automatic slider that can be used to put up you favorite posts.

Each image is 610x320 px in size and appears with the post title and description. To activate the slider, access your Edit Html and search for this code -

<li class='s3sliderImage'>
<a href='#PUT YOUR LINKS TO THE POSTS HERE'><img alt='Imagen 2' src='IMAGE URL'/></a>
<span>
<a class='featured-title block' href='#PUT YOUR LINKS TO THE POSTS HERE' rel='bookmark' title='PUT YOUR POST TITLE HERE'>PUT YOUR POST TITLE HERE</a><br/>
PUT SOME DESCRIPTION OF YOUR POST HERE
</span>
</li>

Add your links at the places mentioned in the code, and repeat the steps for more slides. In the main post area, details such as time stamp and author comes below the headline and labels are at the end of the post. Like most templates, this one too has Read More integrated in it.

The single side column includes social bookmarking icons - Twitter, Facebook, Digg etc. - internal search box, ad space and a featured video section to upload your favorite videos. The remaining space can be used for additional blogger widgets.

Download the Sevim Blogger Theme

Waka Waka Time For Africa Blog Theme edit post

Posted by Bhavika On Monday, June 21, 2010 0 comments
With the football World Cup fever rising across the world, here's a blogger template to note down your feelings, views, opinions about your favorite team and players. Waka Waka Time For Africa is a 2 column football theme Designed by EZwpthemes and converted to blogger by Anshul.
Waka Waka Time For Africa, football blog Theme
This template has a steady background image of a football stadium with the 2 columns scrolling on it. The header has images of various players and the World Cup placed at the center, where you can add your blog title and a brief summary.

Below that is the main column and the left sidebar. At the start of the main column is the menu bar to display your categories, and below it each post appears with a football icon next to the headline. Post details like the date stamp, labels appear after the headline, and social bookmarking icons, author and comments come at the end of the post.

The sidebar includes a small welcome section at the top where you can write down any message for your readers. Below it is the search box and RSS subscribe icon to help readers keep updated with the latest posts. Additional blogger widgets can be included below that.

Download the Waka Waka Time For Africa, Football Blog Theme

Choco Blogger Theme edit post

Posted by Bhavika On Saturday, June 05, 2010 4 comments
A sweet template is what I would call the Choco Blogger Theme, an original creation of Best Theme and ported to blogger by New WP Themes.
choco blogger blog template
Its a 2 column theme with a neat colour scheme and the basic required features of a blog. It comes with dual navigation bar, each above and below the header space. On the right of the first menu bar is the internal search box, while in the main header, you can change the blog logo from Edit Html. Search for the following code and replace all the text marked in bold with your blog logo and url.

<div class='span-24' id='header'>
<div class='span-12'> <a expr:href='data:blog.homepageUrl'><img alt='Wwww.BestTheme.Net' src='http://3.bp.blogspot.com/_yPlAAAH9bEo/TAeKFPnt_oI/AAAAAAAACMo/FwNYJne-Nno/s1600/logo+(1).png' title='Www.BestTheme.Net'/></a> </div>

Next to the logo you can also place your ad banner. Below that is the second navigation bar where you can place your other sections from Edit Html. Simply search for this code and replace all the # that follows with your links.

<div class='navcontainer'>
<ul id='nav'>

The main highlight of this theme would be the slider, a good feature since it helps you to show your top or favorite posts. In order to activate the slider, go to Edit Html and look for this code -

<div id='s3slider'>
<ul id='s3sliderContent'>
<li class='s3sliderImage'>
<a href='#PUT YOUR LINKS TO THE POSTS HERE'><img alt='Imagen 1' src='http://newwpthemes.com/livedemo/wp-content/themes/Choco/jdgallery/slides/1.jpg'/></a>
<span>
<a class='featured-title block' href='#PUT YOUR LINKS TO THE POSTS HERE' rel='bookmark' title='PUT YOUR POST TITLE'>PUT YOUR POST TITLE HERE</a><br/>
PUT SOME DESCRIPTION OF YOUR POST HERE
</span>
</li>

Insert the relevant links, post description, post title and image (610x320px), as instructed in the above code, and repeat the same steps to add more slides. Below the slider is the main post column, where Read More feature is integrated, and post details like time and labels come below the headline.

The sidebar on the right includes the social bookmarking icons, which you can activate from Edit Html. Below that are two banner ads, RSS subscribe icon and follow me on twitter image. Choco template also includes a Featured Video section to put up any videos of your choice.

Download the Choco Blogger Theme

Photographer Blogger Skin edit post

Posted by Bhavika On Friday, June 04, 2010 1 comments
Photographer is 2 column theme created by Best Theme and designed by Template Mo. It has a professional look and a neat layout.
Photographer Blogger Skin
The header space is used for the blog title and description, horizontal menu bar on the right and an internal search box above it. This is followed by a photo, which can be changed from Edit Html, you need to search for the below code -

<div id='templatemo_welcome_wrapper'><div id='templatemo_welcome'>
<div id='welcome_image'> <span/> <img alt='image' src='

Replace the blogspot image link after this with your image url (photo should be 300x135) and save the template. Adjacent to the photo you can also add a welcome note or some text from Layout--Page Elements, while below it you can display links to your portfolio page and projects.

The author has also provided space to show your top 3 featured posts, to get that working go to Layout--Page Elements, Edit the 3 adjacent gadgets or add a new one. After adding your text in the box, paste the following code to get the Read More icon -

<div class='button_02'><a href='Your post link here'>Read more</a></div>

Generally in other templates, featured posts are picked automatically from the feed, but in this one you have to manually add them.

The main post column has the headline on top followed by time stamp and author, and the labels appear below the post. The Read More feature is also integrated in the template. The single sidebar can be used for the additional blogger widgets.

Download the Photographer Blogger Skin

LK Magazine Blogger Template edit post

Posted by Bhavika On Monday, May 24, 2010 12 comments
LK Magazine Blogger Theme is originally created for blogger by Lasantha. Its a 4 column template packed with plenty of features, if you have lot of content, then you can consider using this template. Let's go through some of its features.
LK Magazine Blogger Template
The header space has a slot on the right for a banner ad, then comes the dual navigation bar - the first one also has a dropdown menu to add sub-categories. To configure the menu bars, access your Edit Html and search for the following code, and add your relevant links -

<li><a href='Your-Link-Here' title='Link-Title'>Link-Name-X</a>

The main post area has an image slider where you display your featured posts, image size would be width-200, height-120. In order to activate your slider, you will need to go to Layout-Page Elements and Add a Gadget. Paste the following code and replace the image links and post headline -

<div id="myslides">

<script type="text/javascript">
stepcarousel.setup({
galleryid: 'mygallery', //id of carousel DIV
beltclass: 'belt', //class of inner "belt" DIV containing all the panel DIVs
panelclass: 'panel', //class of panel DIVs each holding content
panelbehavior: {speed:500, wraparound:true, persist:true},
defaultbuttons: {enable: true, moveby: 2, leftnav: ['http://3.bp.blogspot.com/_4HKUHirY_2U/Swp_uMVeIBI/AAAAAAAAATs/53m4n9dGzso/rem1.jpg', -14, 60], rightnav: ['http://3.bp.blogspot.com/_4HKUHirY_2U/Swp_x-EbbHI/AAAAAAAAAT0/W5WfkjVPzdE/rem2.jpg', 0, 60]},
statusvars: ['statusA', 'statusB', 'statusC'], //register 3 variables that contain current panel (start), current panel (last), and total panels
contenttype: ['external'] //content setting ['inline'] or ['external', 'path_to_external_file']
})
</script>


<div id="mygallery" class="stepcarousel">
<div class="belt">

<div class="panel">
<a href="#" title="NFS Most Wanted">
<img alt="NFS Most Wanted" width="200" src="http://4.bp.blogspot.com/_4HKUHirY_2U/Swp3aiu5SZI/AAAAAAAAASk/yizi7snG_Bg/NFS+Most+Wanted.jpg" height="120"/>
</a>
</div>

<div class="panel">
<a href="#" title="Call Of Duty">
<img alt="Call Of Duty" width="200" src="http://1.bp.blogspot.com/_4HKUHirY_2U/Swp3ntj2moI/AAAAAAAAASs/yE5UW180uuw/Call+Of+Duty.jpg" height="120"/>
</a>
</div>

<div class="panel">
<a href="#" title="MaxPayne3 Game">
<img alt="MaxPayne3 Game" width="200" src="http://3.bp.blogspot.com/_4HKUHirY_2U/Swp5VFoWHVI/AAAAAAAAATk/pFK49oX63xY/maxpayne3+game.gif" height="120"/>
</a>
</div>

<div class="panel">
<a href="#" title="Tomb Raider">
<img alt="Tomb Raider" width="200" src="http://3.bp.blogspot.com/_4HKUHirY_2U/Swp4F6x_GwI/AAAAAAAAATc/zSWizc86amA/Tomb+Rider.jpg" height="120"/>
</a>
</div>

<div class="panel">
<a href="#" title="Harry Potter">
<img alt="Harry Potter" width="200" src="http://2.bp.blogspot.com/_4HKUHirY_2U/Swp37ci8djI/AAAAAAAAATM/h4EWIfrRQUs/harry+potter.jpg" height="120"/>
</a>
</div>

<div class="panel">
<a href="#" title="NFS ProStreet">
<img alt="NFS ProStreet" width="200" src="http://2.bp.blogspot.com/_4HKUHirY_2U/Swp3sTBAurI/AAAAAAAAAS0/luZtbZH5kdQ/NFS+ProStreet.jpg" height="120"/>
</a>
</div>

<div class="panel">
<a href="#" title="MaxPayne Movie">
<img alt="MaxPayne Movie" width="200" src="http://2.bp.blogspot.com/_4HKUHirY_2U/Swp31-yKvyI/AAAAAAAAATE/R9DDNeyELg0/MaxPayne3+movie.jpg" height="120"/>
</a>
</div>

<div class="panel">
<a href="#" title="NFS Undercover">
<img alt="NFS Undercover" width="200" src="http://3.bp.blogspot.com/_4HKUHirY_2U/Swp3_TDx6gI/AAAAAAAAATU/3f5FAgdoT-I/NFS+Undercover.jpg" height="120"/>
</a>
</div>

</div>
</div>
</div>

The main posts appear below the slider, each post has the time stamp, author and comments below the headline. Read More function is also activated in this theme along with jazzy social bookmarking icons that appear after the short summary.

While the right column initially starts with the search box, ad slots and a multi-tabber and then splits in to two columns. To configure the tabs, go to Layout--Page Elements, click on the tab name and add a gadget. In case you want to change the tab names, access Edit Html and find the below code and change the tab names to sections of your choice -

<li class='pop'><a href='#tab11'>Video</a></li>
<li class='fea'><a href='#tab22'>Recent</a></li>
<li class='rec'><a href='#tab33'>Popular</a></li>
LK magazine 3 column footer
Another sidebar is on the right of the main posts, and you can use it to add any blogger widgets. LK Magazine theme also includes a 3-column footer section to display more content.

Download LK Magazine Blogger Template

Lasantha has released the second version of LK Magazine Blog Template -
Download the Version 2 LK Magazine Blog Template

Race Clan Blog Template edit post

Posted by Bhavika On Sunday, May 16, 2010 0 comments
For sports or racing enthusiasts here's a template to display your content. Race Clan is a 2 column theme, originally created by Web2feel and ported to blogger by Anshul.
Race Clan Blogger Template
The header space will include your blog title and description on the left, and search box on the right. The theme has dual navigation bars, below the header, where you can add your blog categories and default pages like Home, Contact and About.

The main post section displays the author name and date stamp below the headline, and time stamp, labels, comments appear at the end of the post. While the single sidebar on the right can be used for your blogger widgets - Recent Posts, labels, archives etc.

Overall Race Clan is a simple theme with a neat layout and colour scheme, and it supports all blog features.

Download the Race Clan Blogger Template

Masipag Blogger Skin edit post

Posted by Bhavika On Wednesday, May 12, 2010 6 comments
Masipag is a 2 column theme originally designed by Paddsolutions and brought to Blogger by Anshul Dudeja. The template has few in-built features and widgets already installed in it. Let's take a look at it.
Masipag Blogger Skin
The header logo can be changed with your blog name by extracting the psd file from the main download folder, open it in photoshop, edit it and upload the logo from header widget in blogger layout. The header space also contains the menu bar for your main categories - Home, Contact and About - which can be changed from Layout-Edit Html, search for the following code and replace all the '#' with the relevant links -

<ul>
<li class='current_page_item'><a href='l'><span class='l'><span class='r'><span class='c'><span><span>Home</span></span></span></span></span></a></li>
<li><a href='#'><span class='l'><span class='r'><span class='c'><span><span>About</span></span></span></span></span></a></li>
<li><a href='#'><span class='l'><span class='r'><span class='c'><span><span>Contact</span></span></span></span></span></a></li>
</ul>

This is followed by a second menu bar to display your blog sections, that has a nice hover-on effect. The main feature of this theme would be the slider that allows you to put up your best or featured posts. To add the images, find the following code in Edit Html and replace # with post url and add your image link as shown in the code below. Repeat the same steps in the next code as well.

<ul class='jcarousel-skin' id='carousel'>

<li><a href='#'><img height='191px' src='IMAGE URL HERE' width='191px'/></a></li>

<li><a href='#'><img height='191px' src='IMAGE URL HERE' width='191px'/></a></li>

<li><a href='#'><img height='191px' src='IMAGE URL HERE' width='191px'/></a></li>

<li><a href='#'><img height='191px' src='IMAGE URL HERE' width='191px'/></a></li>

</ul>

In the main column the post headline is followed by the time stamp and labels on the top and comments on the extreme right. The template also has a related posts widget installed in it, that will appear at the end of each post.

The single sidebar on the right can be used for additional blogger widgets or the default ones like Archives, Labels etc. Masipag also has a 3 column footer space for more content.

Download the Masipag Blogger Template

    Recent Templates

    Recent Comments

    Video Guides