Blogger Store

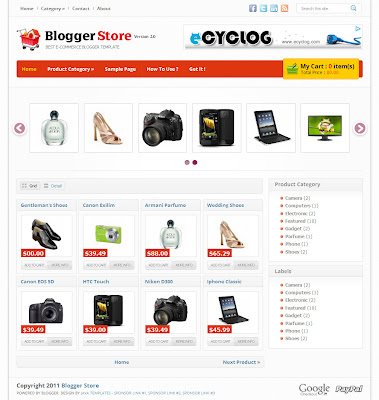
Created for bloggers who want to start an e-commerce or shopping site, Blogger Store is a professional looking template compatible with Paypal or Google Checkout

  • Animated shopping cart
  • Dual dropdown menu bar
  • Automatic featured content carousel
  • Grid and list style post view
Blogger store shopping blogger template

Lightroom Photo Blog Template

A beautiful photo blog template that displays photos in gallery format and is available in two styles basic and advanced

  • Switchable background
  • Attractive theme font
  • Integrated social media icons
  • Left sidebar and navigation menu
Lightroom Photo Blog Template

Magpress

Magazine style theme adapted from wordpress

  • Featured slider section
  • Dual menu bar
  • Tabbed widget
  • 4 column footer
Magpress Magazine style Blog Template

Sens

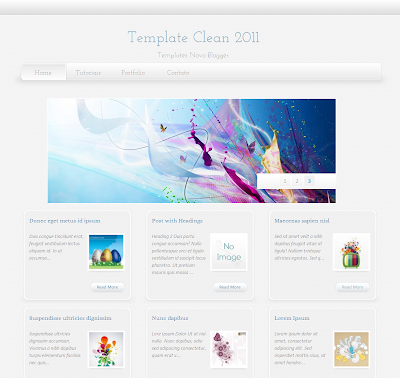
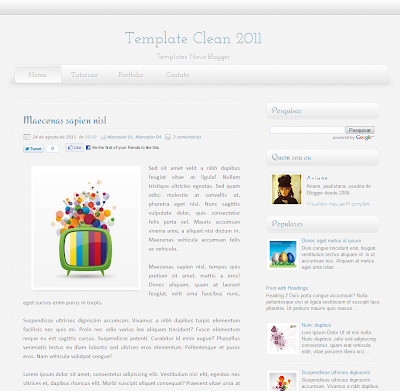
A simple theme with a clean layout

  • Full width featured slider
  • 4 column footer
  • Social widgets integrated
Sens Blogger template

Pop Out Social Bookmarking Widget

A nice-looking pop out social bookmarking widget that allows readers to share their favorite post easily

  • Neat display
  • Easy to install
Add pop out social bookmarking widget for blogger

VideoTek Blogger Theme edit post

Posted by Bhavika On Wednesday, December 21, 2011 1 comments
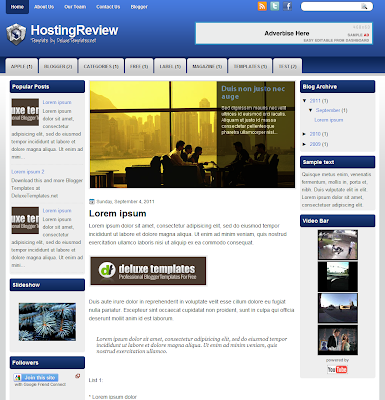
VideoTek is a 2 column template created by Theme Pix and ported to blogger by Deluxe templates. Its a movie-related theme with a featured content slider, social bookmarking icons, pages enabled and an internal search box.
VideoTek Blogger Theme
The first menu bar on top is used to display pages, so once you create a page, the link automatically appears on top. The social bookmarking icons next to it can be changed from Edit Html, search for this line, and replace deluxetemplates with your user name -

twitter.com/deluxetemplates

Similarly for facebook, search for -
facebook.com/deluxetemplates

Replace the user name with your facebook id. Now moving on the slider, the code is inserted in Design--Page elements under Featured Posts, click on edit and replace the relevant details in the code, like the image url, link, post headline and description, follow the same steps for all the slides and save -

<div id="s3slider">
<ul id="s3sliderContent">
<li class="s3sliderImage">
<img src="http://3.bp.blogspot.com/_Ax-O2ayi6kU/TSGsLt4NWOI/AAAAAAAABCg/3Uukug-mi0w/s1600/1.jpg" />
<span><strong><a href="POST_LINK#">Blockquote</a></strong>

<p>Sed dignissim mauris nec velit ultrices id euismod orci iaculis. Aliquam ut justo id massa consectetur pellentesque pharetra ullamcorper nisl...</p>
</span>
</li>

The second menu bar above the slider shows labels automatically. The right sidebar will show different blogger widgets - Archives, Popular Posts, categories etc., as per your choice.

Download the VideoTek Blogger Theme

Creatica Blogger Template edit post

Posted by Bhavika On Friday, December 09, 2011 2 comments
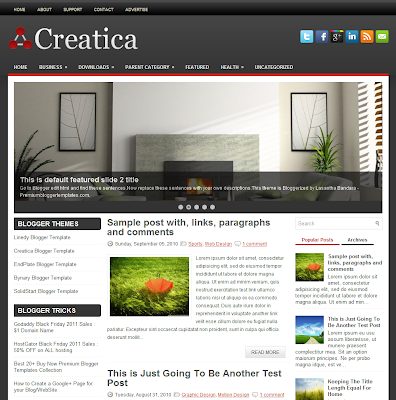
Creatica is a nice-looking 3 column blogger template ported from wordpress by Lasantha and originally a creation of Ft Themes. The theme features a full width slider, dual navigation bar, tabbed widget, featured section and social bookmarking icons.
Creatica Blogger Template
Lets configure the first menu bar, go to Design--Page Elements, click on edit this menu and create a link list like 'Home', 'About', 'Contact' etc., save the changes. For the second menu bar, go to Edit Html and find this code -

<div class='menu-secondary-container'>

<ul class='menus menu-secondary'>

<li><a expr:href='data:blog.homepageUrl'>Home</a></li>

<li><a href='#'>Business</a>
<ul class='children'>
<li><a href='#'>Internet</a></li>
<li><a href='#'>Market</a></li>
<li><a href='#'>Stock</a></li>
</ul>
</li>
Replace '#' with your links and change the category names, follow the same step for the next lines of code. You can also add sub-categories and save the changes. To display your own header logo, go to Page Elements and click on edit 'header', the size should be 329x60px.

Moving on to the featured content slider, make images of 930x300 px, access Edit Html and search for this code -

<div class='fp-slides-items'>
<div class='fp-thumbnail'>
<a href='#'><img src='http://3.bp.blogspot.com/-965Vx1uaaeU/Tt7z4WSnImI/AAAAAAAABIo/DqaQnvVzDWc/s1600/1.jpg'/></a>
</div>
<div class='fp-content-wrap'>
<div class='fp-content'>
<h3 class='fp-title'>
<a href='#'>This is default featured slide 1 title</a>
</h3>
<p>
Go to Blogger edit html and find these sentences.Now replace these sentences with your own descriptions.This theme is Bloggerized by Lasantha Bandara - Premiumbloggertemplates.com.
</p>
</div>

Make these changes in the above code -
- Replace '#' with your post link
- Add image url here - img src='http://3.bp.blogspot.com/-965Vx1uaaeU/Tt7z4WSnImI/AAAAAAAABIo/DqaQnvVzDWc/s1600/1.jpg
- Add the slide title as mentioned above and put in a description below it.

The main column shows summarised posts with 'Read more' link and labels, comments, date stamp shows below the headline. The right sidebar has the search box and tabbed widget, which can be modified from Edit Html. You can change the name of the tabs if you like.

<a href='#widget-themater_tabs-844379150-id1'>Popular Posts</a></li>
<li><a href='#widget-themater_tabs-844379150-id2'>Archives</a></li>

The left sidebar can be utilised to show more blogger widgets - Recent Posts, Comments, About etc. The download link includes Creatica template with and without the slider.

Download Creatica Blogger Template

Adding Alt Text in Images for SEO edit post

Posted by Bhavika On Thursday, December 08, 2011 1 comments
image alt text blogger seo hack
The newer versions of Blogger and for some the older versions as well, don't offer SEO features by default, you have to manually incorporate it. Like the image alt text that forms an important traffic generator for your blog. Search engines can't read images by itself, it depends on alt text or image description.

Here is how you can add alt text to your images. If this is the image code -
<a href="http://2.bp.blogspot.com/-TADZiK7-x-k/TtbnFClFkZI/AAAAAAAAGSU/8icT7geB2Ew/s1600/lightroom_advanced_photo_blogger_template.png" imageanchor="1" style="margin-left:1em; margin-right:1em"><img border="0" height="328" width="400" src="http://2.bp.blogspot.com/-TADZiK7-x-k/TtbnFClFkZI/AAAAAAAAGSU/8icT7geB2Ew/s400/lightroom_advanced_photo_blogger_template.png" alt="Lightroom advanced Photo Blog Template" /></a>
Insert alt at the end of the code and add your image description. This will also help to generate image traffic if you manage to include the right keywords in image alt and at the same time the reader should understand the image content. The text doesn't need to be very long or spammy.

Also while saving or uploading an image ensure that you have renamed the image with the keywords and not just saved it as 'IMG 45672.jpg', this is an effective SEO tip to attract Google image traffic.

In case you are linking the image to another site or content on your blog, then you can add title text after alt, title text would be a short description of the link or the image. Please note that Google uses title text only if the image includes a link.

Magazine Blogger Template for Women edit post

Posted by Bhavika On Tuesday, December 06, 2011 16 comments
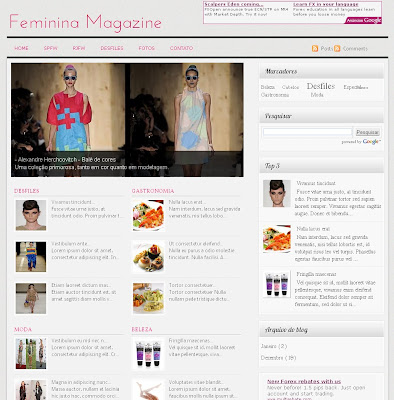
Template Women is a magazine style theme created by Templates Novo Blogger. Its a 3 column template with a slider, summarised display of latest posts by categories on the home page and a 3 column footer.
woman magazine blogger theme
To modify the slider, click on Design-Edit Html and look for the below code -

<!--INICIO DO SLIDE-->

<div id='s3slider'>
<ul id='s3sliderContent'>
<li class='s3sliderImage'>
<a href='COLOQUE AQUI O LINK DO POST'><img src='COLOQUE AQUI O LINK DA IMAGEM'/></a>
<span>COLOQUE AQUI A LEGENDA<br/>
</span>
</li>

Add your post url here - 'COLOQUE AQUI O LINK DO POST'
image url here - 'COLOQUE AQUI O LINK DA IMAGEM' and post description in this line - 'COLOQUE AQUI A LEGENDA'. Similarly, follow the same steps for rest of the slides and save the changes. The image size should be 610px (width) and 310px (height).

In this template, the main column displays in a different style, latest posts from selected labels appear in a summarized format. To get this working, go to Design--Edit Html and search for this code -

imgr = new Array();
imgr[0] = "http://sites.google.com/site/fdblogsite/Home/nothumbnail.gif";
showRandomImg = true;
aBold = true;
summaryPost = 60; // numero de caracteres do resumo
summaryTitle = 25; //numero de caracteres do titulo
numposts = 3; // numero de resumos por categoria

var contarlabels = 0;
labelname = new Array("Desfiles","Gastronomia","Moda","Beleza");
labeltitle = new Array("Desfiles","Gastronomia","Moda","Beleza");


Add the image url in the link marked in italics, that will appear when there are no pictures in the post. While add the labels (marked in bold) of your choice which you want to show up on the home page.

Also search for this code in Edit Html and add your blog url (marked in bold).
salida + = '<div class="featured">';
salida + = '<h3>' + labeltitle [contarlabels] + '</ h3>';
salida salidainner + =;
salida + = '<b> <a href=" http://templatefeminina.blogspot.com /search/label/' labelname[contarlabels] + + More'?max-results=10">' + LabelName [contarlabels] + '</ a> </ b>';
salida + = '</ div>';
document.write (salida);
contarlabels + +;
}


Replace all the links which are marked in bold with your blog url and add the labels you've selected as well. It will appear in the same order on the home page as the code.

<script src='http://templatefeminina.blogspot.com/feeds/posts/default/-/Desfiles?max-results=3&amp;orderby=published&amp;alt=json-in-script&amp;callback=showrecentposts'/>

<script src='http://templatefeminina.blogspot.com/feeds/posts/default/-/Gastronomia?max-results=3&amp;orderby=published&amp;alt=json-in-script&amp;callback=showrecentposts'/>

<script src='http://templatefeminina.blogspot.com/feeds/posts/default/-/Moda?max-results=3&amp;orderby=published&amp;alt=json-in-script&amp;callback=showrecentposts'/>

<script src='http://templatefeminina.blogspot.com/feeds/posts/default/-/Beleza?max-results=3&amp;orderby=published&amp;alt=json-in-script&amp;callback=showrecentposts'/>


You can change the number of posts per label as well, in the above code change - max-results=3. While the sidebar includes the normal features like archives, tag cloud, search box etc. This theme also has a 3 column footer space to add more blogger widgets.

Download the Women Magazine Blogger Template

Lightroom Photo Blog Template edit post

Posted by Bhavika On Wednesday, November 30, 2011 7 comments
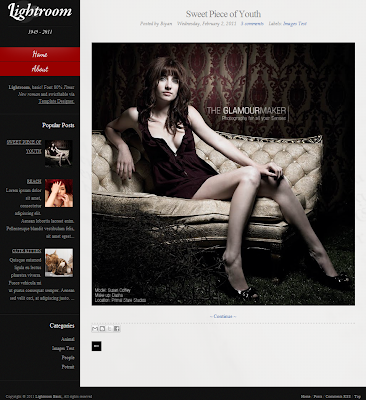
Lightroom is a lovely photography blog template created by Dzignine. Its a 2 column template that displays photos in gallery format on the home page and sidebar on the left. Lightroom is available in two styles basic and advanced, lets take a look at some of the features.
Lightroom advanced Photo Blog Template
In the basic version only one image of 740x740 appears on the home page while in the advanced style the entire photo gallery loads. The theme has a switchable background which is easy to change via template designer (in old Blogger interface) or 'Customize' (in new Blogger interface) then locate the 'background' tab. Select a background from blogger's default list or upload your own.
Lightroom basic Photo Blog Template

Change blog font colours etc. from Template Designer, although the theme comes with an attractive font - Times New Roman - which enhances the overall look of the blog. In order to insert your own blog logo in the header, go to Layout or Page Elements, click on edit 'Header' and upload your file.

The menu bar appears below the logo in the left sidebar along with blogger widgets like Popular Posts, Archives, Categories. Currently, the blog is aligned to the left, you can center align it by adding the below code after #outer-wrapper { from Edit Html.

Margin:0 auto;

The post pages include social bookmarking buttons and a neat comment form.

Download the Lightroom Photo Blogger template

Gears, an Auto Listing Blogger Theme edit post

Posted by Bhavika On Wednesday, November 23, 2011 0 comments
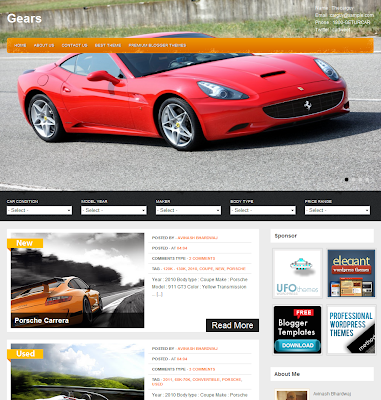
Gears is a 2 column auto listing template designed by Web2Feel and ported to blogger by Best Theme. The theme features include a slider, dropdown labels/categories bar/
gears the blogger template
Once you've uploaded the blogger template, edit the slider images from Design--Edit Html and find this code -

<b:if cond='data:blog.url == data:blog.homepageUrl'>
<div id='pslider'>
<div class='spanel'>
<img alt='' class='slideimg' src='http://3.bp.blogspot.com/-MM04qAN48Ro/TsSZX30JE9I/AAAAAAAAGSs/K42XSHuVIgU/s1600/wallpaper-16004-1024x640.jpg' title=''/>
</div>

<div class='spanel'>
<img alt='' class='slideimg' src='http://1.bp.blogspot.com/-IanfKPcAQmk/TsSaxYedmEI/AAAAAAAAGS4/I0TpkpHd7ig/s1600/2010_porsche_boxster-1024x640.jpg' title=''/>
</div>

Replace the image urls (ideally image size should be 1024x640), add alt text and insert the title, follow the same steps for subsequent slides and save the changes. Below the slider is a select category bar where you display model year, maker, body type, price range etc., in dropdown format. To edit the text go to Edit Html and search for this code -
<div id='filter'>
<div class='clearfix' id='browselist'>
<p class='listin'>
<span>Car Condition</span>
<br/><script type='text/javascript'>
jQuery(document).ready(function($){
$(&quot;select#condition-dropdown&quot;).change(function(){
window.location.href = $(this).val();
});
});
</script>
<select id='condition-dropdown' name='condition-dropdown'><option value='#'> - Select - </option>

<option value='#Link'>New</option>
<option value='#Link'>Used</option>
</select>
</p>

<p class='listin'>
<span>Model Year</span>
<br/><script type='text/javascript'>
jQuery(document).ready(function($){
$(&quot;select#model_year-dropdown&quot;).change(function(){
window.location.href = $(this).val();
});
});
</script>
<select id='model_year-dropdown' name='model_year-dropdown'><option value='#'> - Select - </option>

<option value='#Post Label Link'>2008</option>
<option value='#Post Label Link'>2009</option>
<option value='#Post Label Link'>2010</option>
<option value='#Post Label Link'>2011</option>
</select>
</p>

<p class='listin'>
<span>Maker</span>
<br/><script type='text/javascript'>
jQuery(document).ready(function($){
$(&quot;select#make-dropdown&quot;).change(function(){
window.location.href = $(this).val();
});
});
</script>
<select id='make-dropdown' name='make-dropdown'><option value='#'> - Select - </option>

<option value='#Post Label Link'>Aston Martin</option>
<option value='#Post Label Link'>Audi</option>
<option value='#Post Label Link'>BMW</option>
<option value='#Post Label Link'>Dodge</option>
<option value='#Post Label Link'>Ferrari</option>
<option value='#Post Label Link'>Porsche</option>
</select>
</p>

<p class='listin'>
<span>Body type</span>
<br/><script type='text/javascript'>
jQuery(document).ready(function($){
$(&quot;select#body-dropdown&quot;).change(function(){
window.location.href = $(this).val();
});
});
</script><select id='body-dropdown' name='body-dropdown'><option value='#'> - Select - </option>

<option value='#Post Label Link'>Convertible</option>
<option value='#Post Label Link'>Coupe</option>
<option value='#Post Label Link'>Roadster</option>
</select>
</p>

<p class='listin'>
<span>Price range</span><br/>
<script type='text/javascript'>
jQuery(document).ready(function($){
$(&quot;select#car_price-dropdown&quot;).change(function(){
window.location.href = $(this).val();
});
});
</script><select id='car_price-dropdown' name='car_price-dropdown'><option value='#'> - Select - </option>

<option value='#Post Label Link'>120k - 130k</option>
<option value='#Post Label Link'>150k - 160k</option>
<option value='#Post Label Link'>160k - 170k</option>
<option value='#Post Label Link'>40k - 50k</option>
<option value='#Post Label Link'>50k - 60k</option>
<option value='#Post Label Link'>60k - 70k</option>
<option value='#Post Label Link'>80k - 90k</option>
</select></p>
</div></div>

Now replace #Post Label Link with your created post label url, and you can change the category options as well. Please note - All the options are labels, so make sure to include the right labels in your post. Although the user can only select one option at a time, there is no multiple selection of labels.
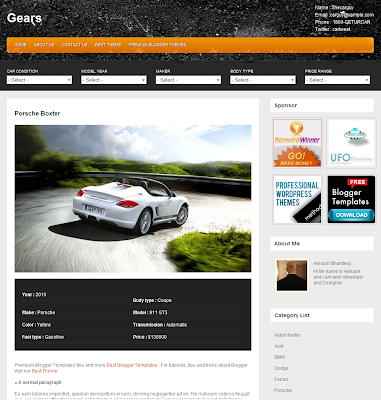
a single post of the gears theme
On entering a post there is a snippet giving complete information of the car, so whenever you create a new post you have to paste the below code, under New Post-Edit Html tab and insert the image link, alt text and fill in all the details or modify it if you like -
<img class="singimg" src="http://3.bp.blogspot.com/-MM04qAN48Ro/TsSZX30JE9I/AAAAAAAAGSs/K42XSHuVIgU/s1600/wallpaper-16004-1024x640.jpg" alt="" />

<div class="cardetails clearfix">
<span><strong>Year :</strong> <a href="#Link" rel="tag">2010</a></span>
<span><strong>Body type :</strong> <a href="#Link" rel="tag">Coupe</a></span>
<span><strong>Make :</strong> <a href="#Link" rel="tag">Porsche</a></span>
<span><strong>Model :</strong> 911 GT3</span>
<span><strong>Color : </strong>Yellow</span>
<span><strong>Transmission : </strong>Automatic</span>
<span><strong>Fuel type :</strong> Gasoline</span>
<span><strong>Price :</strong> $130000</span>
</div>
Below the code you can post your entry or add a description. On the top right corner of the slider is the contact bar to include your name, email, phone number etc. To modify the details go to Design--Edit Html, find this code and insert your details -

<div id='contactlist'>
<ul>
<li>Name : <span>Thecarguy</span></li>
<li>Email :<span>carguy@xample.com</span></li>
<li>Phone : <span>1800-GETURCAR</span></li>
<li>Twitter : <span>cartweet</span></li>
</ul>
</div>

The template also includes a single sidebar and 4 column footer to display additional information, put up ads etc.

Download the Gears, an Auto Listing Blogger Theme

Blogger Store, Shopping Template edit post

Posted by Bhavika On Friday, November 04, 2011 4 comments
If you are looking to start an e-commerce or shopping site then this is the theme for you. Blogger Store is a better version of the shopping cart template designed by Java Templates and Zoom Template. The template includes dual dropdown menu bar, slider, grid and list style post view, animated shopping cart and more.
blogger store shopping template grid view
Once you have uploaded the theme, you can start with customising the template settings. In order to change the Shopping Cart code, go to Edit Html and search for this -

<script type='text/javascript'>
//<![CDATA[
/* SIMPLE CART SETTING
>>>>>>>>>>>>>>>>>>>>>>>>*/
simpleCart.email = 'rifkiblogger@gmail.com';
simpleCart.checkoutTo = PayPal;
simpleCart.currency = USD;
simpleCart.cartHeaders = ['name','thumb_image','Quantity_input','increment', 'decrement','Total'];
//]]>
</script>

Replace the email id marked in bold, and change the default currency 'USD' to your currency, please check the list of available currency in the download folder and save the changes. To proceed with the navigation bar, edit the links in the top menu from Edit Html and add your links here '#' and related text -

<ul id='top-nav'>
<li><a href='#'>Home</a></li>
<li><a href='#'>Category</a>
<ul class='sub-menu'>
<li><a href='#'>Category 1</a></li>
<li><a href='#'>Category 2</a></li>
<li><a href='#'>Category 3</a></li>
</ul>
</li>
<li><a href='#'>Contact</a></li>
<li><a href='#'>About</a></li>
</ul>
Similarly for the second menu bar, modify the links and categories in the below code -
<ul class='nav'>
<li><a class='current' href='/'>Home</a></li>
<li><a href='#'>Product Category</a>
<ul>
<li><a href='#'>Camera</a></li>
<li><a href='#'>Gadget</a></li>
<li><a href='#'>Electronic</a></li>
<li><a href='#'>Phone</a></li>
</ul>
</li>
<li><a href='/p/sample-page.html'>Sample Page</a></li>
<li><a href='#'>How To Use ?</a></li>
<li><a href='#'>Get it !</a></li>
</ul>

Coming to the slider that can be used to display your featured products, the default setting will show your latest posts. If you want to show posts by specific label/category, go to Edit Html and search for this line of code -

<script src='/feeds/posts/default?orderby=updated&amp;alt=json-in-script&amp;callback=featured_product' type='text/javascript'/>

Replace it with this one, and add the label/category -

<script type="text/javascript" src="/feeds/posts/default/-/YOUR LABEL HERE?orderby=updated&amp;alt=json-in-script&amp;callback=featured_product"></script>
blogger store template detail view
Before you start creating new posts you need to insert a code in Settings--Formatting--Post Template (this would be in the old blogger interface) in the new one its Settings--Posts.

<div class="item_image">
<img border="0" class="item_thumb" src="product_image.jpg" />
<span class="item_price">$00.00</span>
</div>

<div class="item_Description">
Descriptions...
</div>

Now you create a post, put in a product title which will also be the product name on ShoppingCart, add an image (preferred size is 140x140), copy the image URL and paste it in the below code, add the product price, description and you are set to publish.

<div class="item_image">
<img border="0" class="item_thumb" src="http://example.com/product_image.jpg" />
<span class="item_price">$00.00</span>
</div>
<div class="item_Description">
Product description.
</div>

There is an animated shopping cart button in the second menu bar that shows the total items and price, on clicking on it detailed view of the products purchased pops up.

Download the Blogger Store, Shopping Template

Super Clean Blog Template edit post

Posted by Bhavika On Friday, September 23, 2011 15 comments
Super Clean Template is a 2 column theme designed by Templates Novo Blogger. It includes some interesting features like the slider, auto display of posts summary on home page, nice hover effects for images and author box.
Super Clean blogger template
To modify the horizontal menu bar, go to Edit Html and look for this code -

<a href='Link 01'>Home</a></li>
<li><a href='Link 02'>Tutoriais</a></li>
<li><a href='Link 03'>Portfolio</a></li>
<li><a href='Link 04'>Contato</a></li>

Change 'Link' to relevant page links with the respective text. Moving on to the slider, you can activate it from Edit Html, search for this code -
<div id='galeria'>

<div class='main_view'>
<div class='window'>
<div class='image_reel'>

<a href='POST_URL' rel='1'><img alt='' src='IMAGE_URL'/></a>

<a href='POST_URL' rel='2'><img alt='' src='IMAGE_URL'/></a>

<a href='POST_URL' rel='3'><img alt='' src='IMAGE_URL'/></a>

</div></div>


<div class='paging'>
<a href='POST_URL' rel='1'>1</a>
<a href='POST_URL' rel='2'>2</a>
<a href='POST_URL' rel='3'>3</a>

</div></div>

Simply insert the post urls and image links as mentioned in the above code, images should be 800px × 289px. In the main column summary of posts with thumbnails appear automatically, and a replacement image appears when there is no picture in the post.
Super Clean Template
The post pages have Twitter and Facebook share button already integrated under the headline and at the end of the post is the author box with your avatar. To edit it, click Edit Html--Expand Widget Template and look for this code -
<!-- Post-Autor -->

<div class='post-autor'>
<span class='autor-avatar'><img src='Avatar_url'/></span>

<span class='autor-descrição'>

<h4>Title</h4>

<p>Author description.......................</p>

</span>

</div>

Add the title and author description in the above code, save the changes. The sidebar includes the popular posts widget, archives, search, categories etc., you can modify that as per your choice. Overall its a nice template to use to display varied content.

Download the Super Clean Template

Hosting Review Blogger Theme edit post

Posted by Bhavika On Saturday, September 10, 2011 0 comments
Hosting Review is an original blogger theme created by Deluxe Templates. This 3-column blogger layout has a featured slider, dual menu bar, widget ready sidebars and social bookmarking icons, and is suited for a technology theme.
Hosting Review tech Blogger Theme
The header section includes the search box, 468x60 banner ad and social media icons. In order to change the twitter and facebook links, go to Design--Edit Html, search for this code and replace deluxetemplates with your id -

http://www.twitter.com/deluxetemplates

http://www.facebook.com/deluxetemplates

To activate the slider, go to Design--Page Elements, click on 'Edit' Featured posts section, add this code -

<div id="s3slider">
<ul id="s3sliderContent">
<li class="s3sliderImage">
<img src="IMAGE_URL" />
<span><strong><a href="POST_LINK">POST_HEADLINE</a></strong>

<p>POST_DESCRIPTION...</p>
</span>
</li>

<li class="s3sliderImage">
<img src="IMAGE_URL" />
<span><strong><a href="POST_LINK">POST_HEADLINE</a></strong>

<p>POST_DESCRIPTION...</p>
</span>
</li>

<li class="s3sliderImage">

<img src="IMAGE_URL" />
<span><strong><a href="POST_LINK">POST_HEADLINE</a></strong>

<p>POST_DESCRIPTION...</p>
</span>
</li>

<div class="clear s3sliderImage"></div>
</ul>
</div>

Add the relevant links as mentioned in the code and save the changes. The two sidebars on either side of the main column include various widgets - About us, archive, Popular Posts widget etc., modify them as per your need from Design--Page Elements.

Download the Hosting Review Blogger Theme

Sonya Blogger Template edit post

Posted by Bhavika On Tuesday, September 06, 2011 4 comments
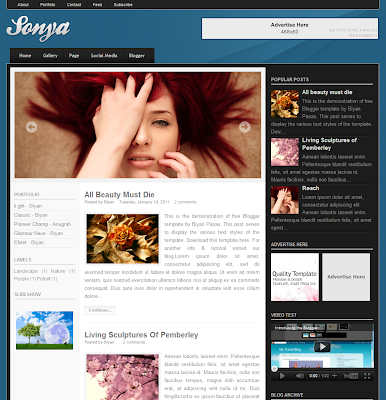
Sonya is a 3 column blogger theme created by Dzignine. It has a nice sliding effect for featured posts and a neat popular posts widget adjacent to it.
Sonya
The dual navigation bar are completely customisable from Design--Page Elements, locate the 'navigation' section, click the edit link and add your links in the new pop up window that opens.

You can place a banner ad in the header section. Now moving on the slider, go to Edit Html and look for this code -

<li><a href='#'><img src='#'/></a></li>

Replace the first '#' with your post link and the second '#' with your image url, save the changes. The theme has two sidebars on either side of the main column, the right column comes with the Popular Posts widget, sponsor ads, blog archive etc. While the left sidebar can be used for other blogger widgets.

The theme has two versions - Personal (withour slider and auto read more) and business (with slider and auto read more). You can download both from the link below

Download the Sonya Blogger Template

Vasiliki Blog Theme edit post

Posted by Bhavika On Sunday, August 28, 2011 0 comments
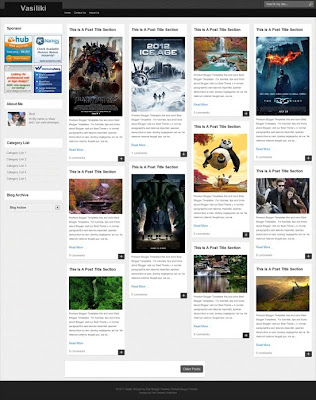
Vasiliki is a 3 column blogger template originally created by Web2feel and ported to blogger by Best Theme. The template is unique in a way since the posts in the main column are arranged in grids in a brick fashion.
Vasiliki free Blog Theme
As you can see in the screenshot above, the header section includes the blog title, menu bar and search box. To edit the menu bar, go to Design--Layout and click on add new widget at the top of posting named linklist/ Top Menu/Menu etc, insert link widget to it, and save the changes.

Now for the important part - the main post area - use images which are 600px, in case they larger than that it will be resized automatically. Each grid displays post summaries with the 'Read More' link and number of comments.

The sidebar is widgetized so you can add different content including archive, recent posts, categories, sponsor ads etc.

Download the Vasiliki Blog Theme

Prof Owl Blogger Template edit post

Posted by Bhavika On Tuesday, August 23, 2011 1 comments
Prof Owl is a 2 column blogger template designed by WP Themes Expert and coded for blogger by Falcon Hive.
Prof Owl free Blogger Template
It has a simple layout and colour scheme. The header section is cute with an owl image on the side and the navigation bar below it where the links appear automatically on creating blog pages.

The columns are designed in a notebook format and it has the date stamp pinned on the side. It also includes a custom search box embedded in the sidebar, followed by blogger widgets that look like papers clipped together.

Its a nice theme to use if you have a personal diary blog or on random thoughts etc.

Download the Prof Owl Blogger Template

Template Pin-Up 2 Blogspot Skin edit post

Posted by Bhavika On Sunday, August 14, 2011 0 comments
Template Pin-Up 2 is a 2 column blogger skin designed by Templates Novo Blogger. Its an interesting theme with a nice look and feel, and can be used for a celebrity, lifestyle or a beauty blog.
Template Pin-Up 2 Blogspot Skin
Pin-Up 2 has a dual menu bar each one is placed above and below the header space. To edit the top right menu bar, just create a list of links and add it above the header from Design--Page Elements. For the second bar, access Edit Html and look for this code to modify -

<!-- Inicio do Menu2 -->
<div id='subscribe'>
<ul>
<li class='link1'><a href=''>Categorias</a></li>
<li class='link2'><a href=''>Fotos</a></li>
<li class='link3'><a href=''>Arquivos</a></li>
<li class='link4'><a href=''>Sites</a></li>
</ul>
</div>
<!-- Fim Menu -->

</div>

Place your link between a href='', change the titles - Fotos, Sites etc., and save the changes. The main column area is pretty impressive with the nice Read More icons after each post, and the icons also appear in the sidebar.

This theme includes the related posts widget that appears in the form of a slider, and 3 column footer space.

Download the Template Pin-Up 2 Blogspot Skin

Add Author Box Below Blogger Posts edit post

Posted by Bhavika On Wednesday, August 03, 2011 3 comments
add author information box below blogger posts
Ever thought of adding a author box at the end of a post giving information about you to your readers? Its a common feature on many wordpress blogs, and now its possible to add it on blogger blogs as well.

Here is a step-by-step instruction to display an author box. Go to Design--Edit HTML, click on expand widgets and search for this code -

]]></b:skin>

Add the following code just above that -

.author_info {
float: right;
width: 573px;
padding: 10px;
border: 1px solid #e0e0e0;
margin-bottom: 15px;
margin-top: 15px;
background: #eee;
}
.author_info h3 {
margin-bottom: 10px;
}
.author_photo {
float: left;
margin: 0 0 0 10px;
}
.author_photo img {
margin-right: 10px;
border: 1px solid #e0e0e0;
}

Now look for this line of code -
<div class='post-footer-line post-footer-line-1'>

Insert the following below it and save the changes -
<b:if cond='data:blog.pageType == &quot;item&quot;'>
<div class='author_info'>
<div class='author_photo'>
<img alt='author' src='http://3.bp.blogspot.com/_tbHfaj1A058/TSGc3fOc-NI/AAAAAAAAL7A/GU6dmnqINik/s1600/images.jpeg'/></div>
<h3>About the Author</h3> This article is written by: <a href='YOUR_BLOGGER_PROFILE_LINK'><b>YourName</b></a> - who has already written <b>30</b> articles for <a href='BLOG_LINK'>BLOG_NAME</a> YourName is a professional web designer. Catch him on <a href='http://twitter.com/yourID'>Twitter</a>, <a href='Your Facebook URL'>Facebook</a> or <a href='your e mail ID'>email</a> him <br> </br> <br> </br>
YourName&#39;s <a href='your web url'>Website</a><br style='clear:both;'/>

</div>
</b:if>
Replace the text where ever mentioned in the above code, add your profile link, facebook, twitter ID and your contact details. You can also fiddle around with the font, spacing, alignment of the box etc in the first code.

Display Comment Avatar or Profile Images edit post

Posted by Bhavika On Friday, July 29, 2011 2 comments
add comment profile images or avatar to blogger
Adding profile images or better known as 'avatar' to blogger comments is a useful feature already enabled for all the blogger blogs, but its available only if you are using the default Blogger themes.

Now to add avatars in your comment section for customised or 3rd party blogger templates, here's a quick look into this blogger hack.

If you are using the default blogger themes, go to Settings--Comments, scroll down and click on Yes in Show profile images on comments box, save the settings and its done!

add avatar for comments in blogger
In case the profile images don't appear, then simply go to Design--Edit HTML and click the "Revert widget templates to default" link near the bottom of the page. This should do the trick! (This step is only meant for standard blogger templates)

For customised blogger templates, follow these simple steps. Go to Design--Edit Html, click on 'Expand widget templates' box and search for this line of code -

<dl id='comments-block'>

or if your template uses 'div' then replace 'dl' with div.

<div id='comments-block'>

Replace it with this code -

<dl expr:class='data:post.avatarIndentClass' id='comments-block'>

The next step will be to find this line of code -

<a expr:name='data:comment.anchorName'/>

And immediately before it, paste this code -

<b:if cond='data:comment.favicon'>
<img expr:src='data:comment.favicon' height='35px' style='margin-bottom:-2px;' width='35px'/>
</b:if>
<a expr:name='data:comment.anchorName'/>
<b:if cond='data:blog.enabledCommentProfileImages'>
<data:comment.authorAvatarImage/>
</b:if>

Save the changes and the profile images or avatars will appear next to the comments. Please note, in case the author comments are highlighted in your template, then search for this code which will appear twice in the template -

<a expr:name='data:comment.anchorName'/>

and insert the above code again.

For anonymous comments

Comment avatars are only displayed if the commentator is using Google or Blogger profile. If the reader is commenting anonymously or using URL, no image will be displayed. To add an image just add a small piece of code to your template.

Search for this line in Edit Html -

]]></b:skin>

and right before it, insert this code, you can edit the width, height and image to be displayed -

/* Avatar */
.avatar-image-container img {
background:url(ADD_DEFAULT_IMAGE_URL);
width:35px;
height:35px;
}

The last step would be to style the profile images so its displayed properly next to the comments, as shown in the top image. Insert this code in addition to the one given above, you can adjust the margin settings as per your preference and save the changes.
.avatar-image-container {
width:35px;
height:35px;
float:left;
margin:0px 10px 5px 2px;
}
Hope you liked this tutorial, and post a comment in case you face any problem to get this working.

Medusa Blog Template edit post

Posted by Bhavika On Wednesday, July 27, 2011 2 comments
Medusa is a 2 column professional theme adapted from wordpress by and designed for blogger by Lasantha. The theme includes a slider gallery, dual menu bar and 4 column footer.
Medusa professional Blog Template
It has a neat slider with post text on the side of the image. In order to modify the slider, go to Design--Edit Html and find the below code -

<!-- Featured Slide 1 Code Start -->
<li>
<div class='mytext'>
<a href='FEATURED-ARTICLE-1-LINK HERE'>
<img class='slimg' src='IMAGE_URL'/>
</a>
<h2><a href='#'>SLIDE 1 TITLE HERE</a></h2>

<p>ADD POST DESCRIPTION</p>

<div class='slimeta'>
<a class='rmore' href='FEATURED-ARTICLE-1-LINK HERE'/>
</div>
</div>
</li>
<!-- Featured Slide 1 Code End -->

Insert the relevant details as mentioned in the code, similarly edit the rest of the slides and save the changes. This template includes dual navigation bar, to customise the first one, search for this line of code in Edit Html -

<div id='catmenucontainer'>

Now below this you need to add the pages - Home, Contact, about etc.- you want to display and save the changes. While for the second menu bar which also has a drop-down, you need to find this code and in subsequent line of code add the links you want to display -

<div id='foxmenucontainer'>

There is an extra column between the menu bar and main column where you can add more details about your site, work, contact page, etc., in a snippet format. The single sidebar on the right has the internal search box, followed by other widgets. This template also includes a 4 column footer to display more content.

Download the Medusa Blog Template

Glamour Neue, Photo Blog Template edit post

Posted by Bhavika On Wednesday, July 20, 2011 8 comments
Glamour Neue is a 3 column photo blog template created by DZignine. Its a lovely theme to showcase your photos featuring a slider, thumbnails below it and 3 column footer.
Glamour Neue, Photo Blog Template
To edit the slider, go to Edit Html and look for the below code -

<li><a href='#'><img src='img.jpg'/></a></li>

Now replace the first '#' with image link or post link, 'img.jpg' with your image, repeat the same steps for subsequent code. Keep the image width 900 px. When you click on the image it becomes a single column theme, and details like author, date stamp and labels appear below the post headline.

You can tweak the background, text color, font, etc via 'Template Designer'. Also you can change the scrolling speed of the slider from Edit Html, look for 'speed' and change its value. While you can utilise the footer to add more blogger widgets.

Download the Glamour Neue, Photo Blog Template

Shopping Cart Free Blogger Theme edit post

Posted by Bhavika On Friday, July 15, 2011 32 comments
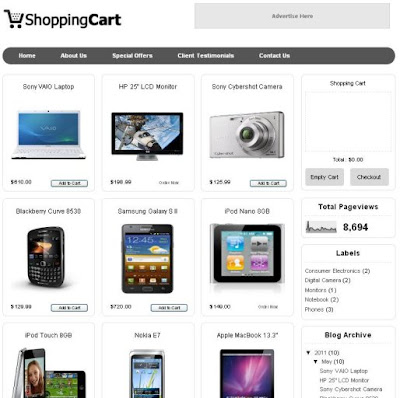
Finally a shopping cart e-commerce theme for blogger. Designed by BloggerMint, its a 4 column free template that comes with 'Add to Cart' and 'PayPal Checkout' function for Blogger.
Shopping Cart Free Blogger Theme
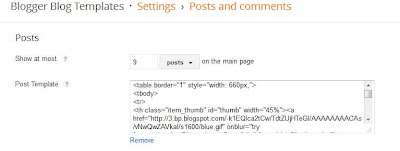
Once the template is uploaded, go to Settings--Posts and Comments (or in old blogger Settings--Formatting), set the desired number of posts to be shown on the blog, and then next to Post Template, click on add and insert this code, save the changes -
shopping cart blogger template code
<table border="1" style="width: 660px;">
<tbody>
<tr>
<th class="item_thumb" id="thumb" width="45%"><a href="http://3.bp.blogspot.com/-k1EQIca2tCw/TdtZUjHTeGI/AAAAAAAACAs/vNwQwZAVkaI/s1600/blue.gif" onblur="try {parent.deselectBloggerImageGracefully();} catch(e) {}"><img alt="" border="0" id="BLOGGER_PHOTO_ID_5610175970378217570" src="http://3.bp.blogspot.com/-k1EQIca2tCw/TdtZUjHTeGI/AAAAAAAACAs/vNwQwZAVkaI/s400/blue.gif" style="cursor: hand; cursor: pointer; display: block; height: 164px; margin: 0px auto 10px; text-align: center; width: 148px;" /></a></th>
<td><input class="item_add" type="button" value="Add to Cart" /></td>
</tr>
<tr>
<th><b>Item Name</b></th>
<td class="item_name">Product Name Goes here!</td>
</tr>
<tr>
<th><b>Price</b></th>
<td class="item_price">$99.99</td>
</tr>
<tr>
<th><b>Description</b></th>
<td class="item_Description">Your product description here!</td>
</tr>
<tr>
<th><b>Available Stock</b></th>
<td>Stock count here!</td>
</tr>
<tr>
<th><b>Misc</b></th>
<td>Place extra thumbs/images of product here</td>
</tr>
</tbody>
</table>

This code will add the table in each 'New Post', now you have to fill in other information in the table like Item Name, Price and Description, which will be used as values during Paypal checkout. Also remove the default image from the code and add you own (keep the image sizes medium for it to fit properly).

Please not that you would have to remove the 'div class' and 'a href' from the image code, which should look something like this -

<div class="separator" style="clear: both; text-align: center;">
<a href="http://2.bp.blogspot.com/-FvpLfhHu9U8/Th_Wv1Bdu4I/AAAAAAAAGNY/9BvaHAJdFfE/s1600/P1020156.jpg" imageanchor="1" style="margin-left:1em; margin-right:1em"><img border="0" height="240" width="320" src="http://2.bp.blogspot.com/-FvpLfhHu9U8/Th_Wv1Bdu4I/AAAAAAAAGNY/9BvaHAJdFfE/s320/P1020156.jpg" /></a></div>

And keep only this code in the table, those are the only changes you need to make and publish your post -

<img border="0" height="240" width="320" src="YOUR_IMAGE.jpg" />

Now moving on to Paypal Email set-up, go to Template--Edit Html (Design--Edit Html in old blogger) and search for this code -

<script type='text/javascript'>
simpleCart.email = &quot;bloggermint@gmail.com&quot;;
simpleCart.checkoutTo = PayPal;
simpleCart.currency = USD;

Replace the text in bold, which is the Paypal email id, with your own and save the changes.
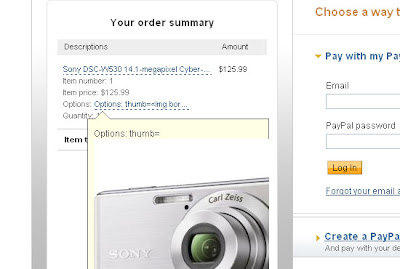
paypal checkout page for blogger shopping cart theme
For those who don't have a Paypal account or credit card, can still purchase the product by filling the contact form. In order to integrate the form, you need to follow the steps below -

1) Sign up for Kontactr, once that is done scroll down the page until you find “Ajax Embed Widget” or “Buttons Code” and get your Kontactr ID, it will look something like this - id=39662, copy it.

2) Access Edit Html and insert this code right before the closing </head> tag.

<script type="text/javascript" src="http://kontactr.com/kpu/kontactr.js"></script>

3)Now replace this code in Edit Html, it will appear in the top part of the CSS -

input.item_add{

with the one below -

span.item_add{

4) Similarly, search for this code -

input.item_add {

and change it to one below -

span.item_add {

The next step will be to go to Settings--Posts and comments, you will find the option 'Post Template' where you have to insert the following code, change the Kontactr id=39662 with yours -

<table border="1" style="width: 660px;">
<tbody>
<tr>
<th class="item_thumb" id="thumb" width="45%"><a href="http://3.bp.blogspot.com/-k1EQIca2tCw/TdtZUjHTeGI/AAAAAAAACAs/vNwQwZAVkaI/s1600/blue.gif" onblur="try {parent.deselectBloggerImageGracefully();} catch(e) {}"><img alt="" border="0" id="BLOGGER_PHOTO_ID_5610175970378217570" src="http://3.bp.blogspot.com/-k1EQIca2tCw/TdtZUjHTeGI/AAAAAAAACAs/vNwQwZAVkaI/s400/blue.gif" style="cursor: hand; cursor: pointer; display: block; height: 164px; margin: 0px auto 10px; text-align: center; width: 148px;" /></a></th>
<td><span class="item_add"><script type="text/javascript"> id=39662; t=1; ctxt="Order Now"; </script>
<script type="text/javascript" src="http://kontactr.com/kpu/kontactr.js"></script></span></td>
</tr>
<tr>
<th><b>Item Name</b></th>
<td class="item_name">Product Name Goes here!</td>
</tr>
<tr>
<th><b>Price</b></th>
<td class="item_price">$99.99</td>
</tr>
<tr>
<th><b>Description</b></th>
<td class="item_Description">Your product description here!</td>
</tr>
<tr>
<th><b>Available Stock</b></th>
<td>Stock count here!</td>
</tr>
<tr>
<th><b>Misc</b></th>
<td>Place extra thumbs/images of product here</td>
</tr>
</tbody></table>

Shopping Cart template also has a 4 column footer and a single sidebar on the right to display other blogger widgets like Archive, Categories, etc.

Download the Shopping Cart Free Blogger Theme

Capture Photo Template edit post

Posted by Bhavika On Wednesday, July 06, 2011 6 comments
Capture is a beautiful photo template created by Dzignine. The theme has minimalist white design and clean layout for a photography or portfolio blog.
Capture photo blogger template
The home page includes a photo gallery on the left, and on clicking an image it takes you the post page with more information related to the pictures. The blog title, tagline and the navigation bar is neatly placed next to the gallery.

Below it you can insert blogger widgets of your choice. The theme also has a 3-column footer to display your contact details, labels, popular posts etc.

Download the Capture Photo Template

Simplex Focus Blog Template edit post

Posted by Bhavika On Tuesday, July 05, 2011 1 comments
SimplexFocus is a 3 column blogger theme created by Simplex Design. It has a neat layout with nice hover on effects, featured post section and horizontal recent comments and category bar.
Simplex Focus free Blog Template
In order to change the header logo, click on Design--Edit Html and look for this code -

<a rel="home" title="Home" href="http://simplexfocus.blogspot.com">

Replace it with this code and save the changes -

<a rel="home" title="Home" href="yoursite url">
<img src="logo url"/>
</a>

The first post is highlighted with a bigger image and post summary, and on the right is the search box, ad space and social media icons to allow your readers to subscribe or follow your latest updates. You can modify the account details from Edit Html, simply replace the text in bold, and repeat the steps for twitter, RSS etc., as well.

<div class="widget1" id="subscribe-follow">
<div class="h4">Like, Follow, and Subscribe</div>
<a rel="nofollow" title="Fan us on Facebook" href="http://www.facebook.com/simplexdesignblog" class="fan-on-facebook"></a>

Do the same with this code and replace the text marked in bold -

<div class="widget1" id="site-sns">
<a title="SimplexDesign on Facebook" href="http://www.facebook.com/simplexdesignblog" class="sns-facebook">
<span class="icon sns-facebook"></span> SimplexDesign on Facebook <span class="raquo">»</span>
</a>

Each subsequent post appears in a thumbnail format and on hovering on it the post is highlighted with a short brief and it also shows the number of comments. When you enter the post, the category shows up on top along with the author name, date stamp and social bookmarking icons. While the sidebar pops up with links and images of your previous posts.
Simplex Focus Blog Template
Below the main post area, recent comments and categories are displayed in a horizontal manner. To add links in the category bar, search for this code in Edit Html and insert the links and text -
<div id="popular-tags">
<span class="nav-title">Category : </span>
<a href="">lifestyle</a>
<a href="">faces</a>
<a href="">interests</a>
<a href="">youth</a>
<a href="">money</a>
<a href="">news</a>
<a href="">work</a>
</div>

Download the Simplex Focus Blog Template

Thesis Theme for Blogger edit post

Posted by Clyde On Monday, July 04, 2011 1 comments
The Thesis Theme is a well known worpress template for the ability to customize it to suit any website. Today we have the thesis theme for blogger ported by New Blogging Tipz.
thesis for blogger
The template like most modern blog themes comes with a slider, luckily its not one thats too heavy but a smaller one similar to the hybrid theme. Apart from that there are two navigation menus that provides you enough of space to display all your categories, pages and links. The thesis for blogger theme comes with social media icons, read more for posts, a bunch of floating icons, adsense ready widgets and placement and a extremely functional footer that can be seen below.
thesis theme blog footerThe footer offers a nice section for the labels, a three column footer and a cross section column after that where you can add what you like.

The perks are not just with the home page, each post has a nicely crafted section that includes an ad with prime position and social icons besides it. The end of the post has an author description widget where you have your pic and bio etc.

To customize the navbar just look for the words, home, label one etc and replace it with your own links, for further customization you can always refer to the author site or post a comment for help.

Download the Thesis Theme for Blogger

Nivex Blogger Template edit post

Posted by Bhavika On Friday, July 01, 2011 1 comments
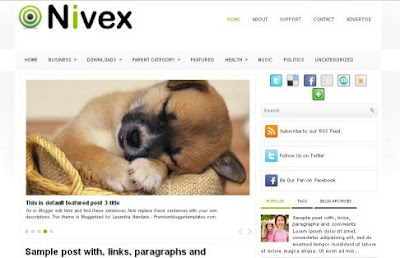
Nivex is a 2-column template created by FT Themes and adapted for blogger by Lasantha Bandara. The theme includes featured post slider, dual menu bar with dropdown and tabbed widget. Lets take a look at few steps to modify the blogger template.
Nivex Blogger Template
The second menu bar can be changed from Design--Edit Html, and search for this code -

<div class='menu-secondary-wrap'>

Below that you will see the code which needs to be changed, replace '#' with url to the post or category that needs to be linked and add the text as well. Repeat the same step for all the navigation links. To add your blog logo, you can access Page Elements and insert the image, size must be 294px width and 66px height.

Now for the featured slider, go to Design--Edit Html and find the below code -

<div class='featuredposts clearfix'>

That is the begining of the slider code, you have to replace 'This is default featured post 1 title' with your post title, add the post description, and image address and post link as mentioned in the code text. Save the changes and your slider is ready!

Below the slider each post appears in 'Read More' format with comments and date stamp displayed on the home page. The single column on the right features social media icons, search box and subscribe to blog link. While the tabbed widget allows you to display more content, in order to modify the tab names click on Edit Html and look for the below code -

<ul class='tabs-widget tabs-widget-widget-themater_tabs-1432447472-id'>
<li><a href='#widget-themater_tabs-1432447472-id1'>Popular</a></li>
<li><a href='#widget-themater_tabs-1432447472-id2'>Tags</a></li>
<li><a href='#widget-themater_tabs-1432447472-id3'>Blog Archives</a></li>
</ul>

This is followed by different blogger widgets like Recent posts, label cloud etc.

Download the Nivex Blogger Template

SimplexMag Blog Template edit post

Posted by Bhavika On Thursday, June 16, 2011 0 comments
Simplex Mag is a 3-column theme created for blogger by Simplex Design. Its a nice theme to use for a magazine or photo blog.
SimplexMag magazine free Blog Template
The template features dual navigation bar with a drop-down menu to display various categories and pages. The latest posts display in thumbnail format on the home page and the headline, label and date appears on hovering over the image.

The template includes the pagination script to set the number of posts on each page. Go to Settings->Formatting and insert the maximum number of posts you want to display on the home page to say 6, then go to Design->Edit Html, find this code -

<script type="text/javascript">
var pageNaviConf = {
perPage: 2,
numPages: 2,
firstText: "First",
lastText: "Last",
nextText: "Next",
prevText: "Prev"
}
</script>
Now change perPage value from 2 to 6 or whatever number you choose in the previous step and save the changes. The sidebar has the advertise option to show 125x125 ads from sponsors etc., that can be changed from Design->Page Elements. While the rest of the sidebar content can be customised as per your choice.

SimplexMag comes with a 3 column footer to show different widgets on your blog. Below that is the social bookmarking icons, you can change it from Design->Edit Html and add your account links (text marked in bold) -

<a class="i_rss" href="http://feeds.feedburner.com/Simplex"></a>
<a class="i_twitter" href="http://twitter.com/dinhquanghuy"></a>
<a class="i_facebook" href="http://www.facebook.com/simplexdesignblog"></a>
<a class="i_flicker" href="#"></a>
<a class="top_btn" href="#"></a>

Download the SimplexMag Blog Template

Shadow Blogger Template edit post

Posted by Bhavika On Tuesday, May 31, 2011 3 comments
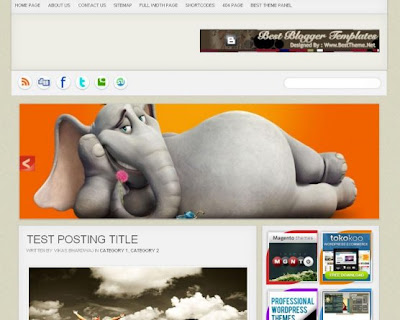
Shadow is a 2 column blogger template created by Best Theme. Its features include a huge slider with nice visual effects and dual menu bar.
Shadow free Blogger Template
The first horizontal navigation bar comes with a dropdown menu, below it you can add your blog title and also display an ad on the right. While the second menu bar shows social bookmarking icons linking to your respective account, and also includes an internal search box.

The main slider can be modified from Design--Edit Html, and look for this code -

<!-- begin SlideShow Here -->
<div id='slide'>
<img alt='#Title' class='slider_image wp-post-image' height='300' src='http://1.bp.blogspot.com/-Df816GBRK3g/TZb34xF1aUI/AAAAAAAAEvw/LTHbrE0Leug/s1600/Spiderman%252BWallpaper%252Bphotos%252Bimages%252Bstills%252Bpictures-4-960x300.jpg' title='#Title' width='960'/>
<a href='#Link'/>

<img alt='#Title' class='slider_image wp-post-image' height='300' src='http://2.bp.blogspot.com/-mvVFo9oMj_Q/TZb4NzZuqrI/AAAAAAAAEv4/Bq_ZJpzblF0/s1600/HortonHearsAWho534051_1280_960_1152x864-960x300.jpg' title='#Title' width='960'/>
<a href='#Link'/>
Simply change the image url, add your post links and title and save the changes. To display more slides, copy the above code and repeat the same steps. The image size should be 960x300.

The single sidebar can be utilised for placing sponsor ads, labels, archives etc. The template is available in different versions - Download the Shadow Blogger Template

Add Post Title to Read More Expandable Link edit post

Posted by Bhavika On Sunday, May 15, 2011 0 comments
Display Post Title next to Read More Link
If you are using Blogger Jump Link or the Read More feature for your posts, then here is a simple customisation tip for you.

You can now add post title next to the 'Read More' text below each post. Go to Design--Edit Html, check on 'Expand widget templates' box and look for the below code -

<b:if cond='data:post.hasJumpLink'>
<div class='jump-link'>
<a expr:href='data:post.url + "#more"' expr:title='data:post.title'><data:post.jumpText/></a>
</div>
</b:if>

Replace it with the following code -

<a expr:href='data:post.url + &quot;#more&quot;' expr:title='data:post.title'><data:post.jumpText/> <data:post.title/></a>

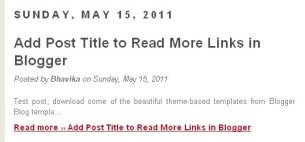
Save the changes and you will see the post headline appear next to the 'Read More' text. In case you are not using Blogger's default Jump link feature and have incorporated 'Read More' code in Edit Html then replace it with the above code and save.

This simple change gives more weightage and prominence to your post. Feel free to contact us in case of any problem.

Baby Online Store Blog Theme edit post

Posted by Bhavika On Sunday, May 08, 2011 1 comments
Baby Online Store is a shopping blogger theme created by Ipietoon. Its a 4 column free template with gallery concept, so you can display the product thumbnails on the home page, just ensure you put an image in every post.
Baby Online Store Blog Theme
The template has a cute header image, you can add your blog title and tagline on the left, while below it is the horizontal menu bar to show the categories. The online shop is a simple display of products, and details would only appear on entering the post.

Baby Online Store also includes a single sidebar on the right and a 4-column footer to add different blogger widgets, about page, etc. Its a simple online shopping theme and can use it if you don't need too many features.

Download the Baby Online Store Blog Theme

Change Post Title Tags for Blogger SEO edit post

Posted by Bhavika On Wednesday, April 13, 2011 11 comments
Ideally the post title should appear before the blog name to have better search engine rankings.

Its a simple and important SEO tip that can really improve your blog's chances of showing in search results for the relevant keywords.

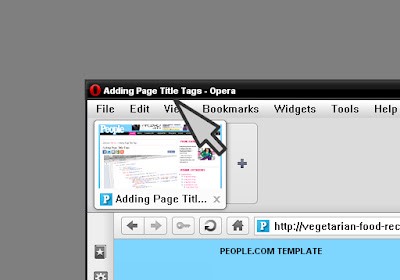
However, Blogger shows the blog name first and then the title of your post, which is not SEO-friendly. Even if you have customised your blogger template or using third-party templates you would need to insert this code in your Html.

Go to Design--Edit Html and look for this line of code -

<title><data:blog.pageTitle/></title>

Replace it with this code and save the changes -
<b:if cond='data:blog.pageType == &quot;index&quot;'>
<title><data:blog.title/></title>
<b:else/>
<title><data:blog.pageName/></title>
</b:if>
Now you can check the post title format on top of your browser, it has changed to only the post or page title.
post title tags swap
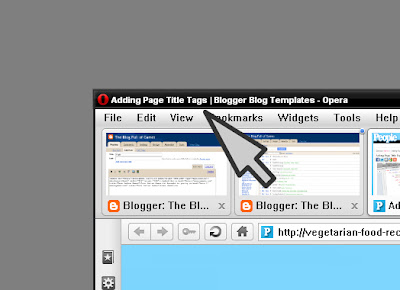
In case you want this format - post title + blog name - then add the below code instead of the one above and save the changes.
post title swap with blog title, seo tip blogger
<b:if cond='data:blog.pageType == &quot;index&quot;'> <title><data:blog.title/></title> <b:else/> <title><data:blog.pageName/> | <data:blog.title/></title> </b:if>
This small SEO tip will definitely improve your search engine rankings.

Women's Secret Blogger Theme edit post

Posted by Bhavika On Tuesday, April 12, 2011 6 comments
Women's Secret is a 2 column blogger skin designed by Ipietoon. Its a nice template to use for a beauty, lifestyle, fashion, or a personal diary blog.
womens-secret-fashion-blogger-theme
The template has a simple and clean layout, and features a nice, chic header image where you can add your blog title, and below is the menu bar to show your categories. In the main post area the headline appears in the center along with author name, date stamp and comments and the categories show up at the end of the post.

The single column on the right can be customised to add different blogger widgets. The template also uses a lovely font for the titles. If you like this template
Download the Women's Secret Blogger Theme

Personas Photo Blog Template edit post

Posted by Bhavika On Saturday, April 02, 2011 6 comments
Personas is an lovely photography theme designed by Dzignine. Its a 4 column template with a nice underwater background image and thumbnail display of posts.
Personas Photo Blog Template
The theme includes a horizontal menu bar on top, followed by the huge header image. While the main post area is in grid format and shows images with headline and number of comments. Each post needs to have an image for the thumbnails to display neatly and the image will be automatically resized.

The 4 column footer space can be used to put up different blogger widgets like Recent posts, Archives etc. Overall, Personas is a suitable theme for a portfolio or photo blog.

Download the Personas Photo Blog Template

The World and Beyond Blog Template edit post

Posted by Bhavika On Friday, March 04, 2011 3 comments
The World and Beyond is a 2 column nature-based template created for blogger by Ezwpthemes.
The World and Beyond nature blog template
Once you upload this template on your blog, you can change the blog title and tag line, then proceed to adding links in the horizontal menu bar. Go to Design--Page Elements, find the top tabs widget, click edit, add the links and save the changes. The menu bar includes a neat RSS icon for your readers to subscribe to the blog and also a welcome note on the right.

While the main column is in a diary form, and each post has social bookmarking icons at the end along with comments. The single sidebar starts with the search box followed by different blogger widgets like archives, recent posts etc.

This theme can be used for nature, science and discovery blog.

Download The World and Beyond Blog Template

People Celebrity Blogger Theme edit post

Posted by Bhavika On Saturday, February 19, 2011 2 comments
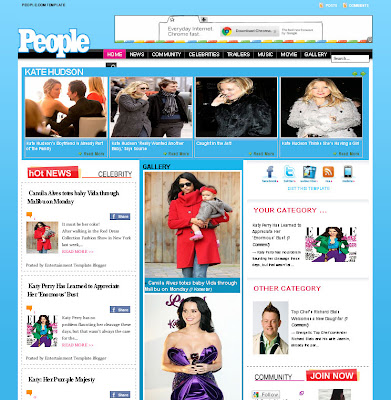
If you are looking for an entertainment or celebrity template then People blogger theme is apt for you. MJ Bahring has created a blogger version of the celebrity site People.com, its a 4 column theme which includes a photo gallery, featured posts slider, categories with an image display on the home page and much more.
People Celebrity Blogger Theme
Once the blog template is uploaded, you can replace the People logo with yours from Edit Html, search for the url mentioned below -

http://3.bp.blogspot.com/_CeuYZ1AeNfs/TU4e1EnSDjI/AAAAAAAAEVc/dG9Y9X3Gw6g/s1600/peoplelogo.png

Below the menu bar you can display featured posts in a slider, just select the label and change it in the below code from Edit Html, you would require minimum of 6 posts for this to work -

label10 = "Kate Hudson";
Title10 = "Kate Hudson";

People template features a photo gallery with captions, in order to get that working, go to Edit Html and look for this code -
<b:section class='middlecol' id='middlecol' preferred='yes'>
<b:widget id='HTML3' locked='false' title='GALLERY' type='HTML'>
<b:includable id='main'>
<!-- only display title if it's non-empty -->
<b:if cond='data:title != &quot;&quot;'>
<h2 class='title'><data:title/></h2>
</b:if>
<div class='widget-content'>
Below this add the following code and change the blog url and also the label (marked in bold) from which the posts need to be pulled out, save the template.

<script language="JavaScript">
imgr = new Array();


imgr[0] = "";
imgr[1] = "";
imgr[2] = "";
imgr[3] = "";
imgr[4] = "";

showRandomImg = true;

tablewidth = 270;
cellspacing = 5;
borderColor = "#fff";
bgTD = "#0b92be";

imgwidth = 270;
imgheight = 300;

fntsize = 14;
acolor = "#FFF";
aBold = true;
icon = " + ";

text = "Komentar";

showPostDate = false;

summaryPost = 0;
summaryFontsize = 12;
summaryColor = "#000";
icon2 = " &rarr; ";

numposts = 3;

home_page = "http://peoplesiteclone.blogspot.com/feeds/posts/default/-/Gallery";

</script>
<script src="http://artist.musikji.net/arthems/recent-categorig.js" type="text/javascript"></script>

Similarly for 'Your category' to display in the right sidebar, you need to add another javascript code given below in Edit Html -

<b:widget id='HTML5' locked='false' title='YOUR Category ...' type='HTML'>
<b:includable id='main'>
<!-- only display title if it's non-empty -->
<b:if cond='data:title != &quot;&quot;'>
<h2 class='title'><data:title/></h2>
</b:if>
<div class='widget-content'>

Insert this code and change the blog url and also the label (marked in bold), save the changes. You can tweak the font size, summary colour etc., in the code to match with your blog.

<script language="JavaScript">
imgr = new Array();

imgr[0] = "http://3.bp.blogspot.com/_GGtgB_7BjRQ/SvJCivDgDrI/AAAAAAAAAAo/kf8-WfTDE18/S1600-R/no-image.png";
imgr[1] = "http://3.bp.blogspot.com/_GGtgB_7BjRQ/SvJCivDgDrI/AAAAAAAAAAo/kf8-WfTDE18/S1600-R/no-image.png";
imgr[2] = "http://3.bp.blogspot.com/_GGtgB_7BjRQ/SvJCivDgDrI/AAAAAAAAAAo/kf8-WfTDE18/S1600-R/no-image.png";
imgr[3] = "http://3.bp.blogspot.com/_GGtgB_7BjRQ/SvJCivDgDrI/AAAAAAAAAAo/kf8-WfTDE18/S1600-R/no-image.png";
imgr[4] = "http://3.bp.blogspot.com/_GGtgB_7BjRQ/SvJCivDgDrI/AAAAAAAAAAo/kf8-WfTDE18/S1600-R/no-image.png";

showRandomImg = true;

tablewidth = 310;
cellspacing = 5;
borderColor = "false";
bgTD = "#fff";

imgwidth = 150;
imgheight = 100;

fntsize = 12;
acolor = "#000";
aBold = true;
icon = " ";

text = "Comment";

showPostDate = false;

summaryPost = 80;
summaryFontsize = 11;
summaryColor = "#000";
icon2 = " &rarr; ";

numposts = 1;

home_page = "http://peoplesiteclone.blogspot.com/feeds/posts/default/-/Hot%20News";

</script>
<script src="http://artist.musikji.net/arthems/recent-categorialbum.js" type="text/javascript"></script>

There are two more javascripts to be inserted in Edit Html in order to get the sidebar working, the code has been given in the download folder under the name 'Installation'.

Download the People Celebrity Blogger Theme

    Recent Templates

    Recent Comments

    Video Guides