Blogger Store

Created for bloggers who want to start an e-commerce or shopping site, Blogger Store is a professional looking template compatible with Paypal or Google Checkout

  • Animated shopping cart
  • Dual dropdown menu bar
  • Automatic featured content carousel
  • Grid and list style post view
Blogger store shopping blogger template

Lightroom Photo Blog Template

A beautiful photo blog template that displays photos in gallery format and is available in two styles basic and advanced

  • Switchable background
  • Attractive theme font
  • Integrated social media icons
  • Left sidebar and navigation menu
Lightroom Photo Blog Template

Magpress

Magazine style theme adapted from wordpress

  • Featured slider section
  • Dual menu bar
  • Tabbed widget
  • 4 column footer
Magpress Magazine style Blog Template

Sens

A simple theme with a clean layout

  • Full width featured slider
  • 4 column footer
  • Social widgets integrated
Sens Blogger template

Pop Out Social Bookmarking Widget

A nice-looking pop out social bookmarking widget that allows readers to share their favorite post easily

  • Neat display
  • Easy to install
Add pop out social bookmarking widget for blogger

Bloggermint, a Premium Blogger Template edit post

Posted by Bhavika On Thursday, August 26, 2010 21 comments
Bloggermint is a premium theme designed by Franklin Manuel. Its a 3 column template with a clean layout and some cool features, which are easy to customize.
bloggermint premium blogger template
The template consists of a dual navigation bar, which is above and below the header. In order to change the links in the topmost menu bar, go to Design--Edit Html and look for the following code -
<ul id='nav1'>

You can add the links to your Home page, contact etc. While the second menu bar below the header image, has a sub-menu to display categories etc. To change the default links, go to Design--Edit Html, search for this code and add your links in the code below this one -
<ul id=’nav2&#8242;>

While in the main column, each post appears automatically in a summarized format with social bookmarking icons at the end of it and an author info widget. In order to edit the text in the author box, access Edit Html and find this code -
<div class='author_info'>

Change the text to what you desire, along with the image link - http://i50.tinypic.com/iw7lec.jpg, create an image with the size 130×130 pixels. Each post also has Facebook and Twitter share button below the headline. To replace the default code with your id, go to Edit Html, expand the template and search for and replace bloggermint with your twitter id -

data-via=’bloggermint’

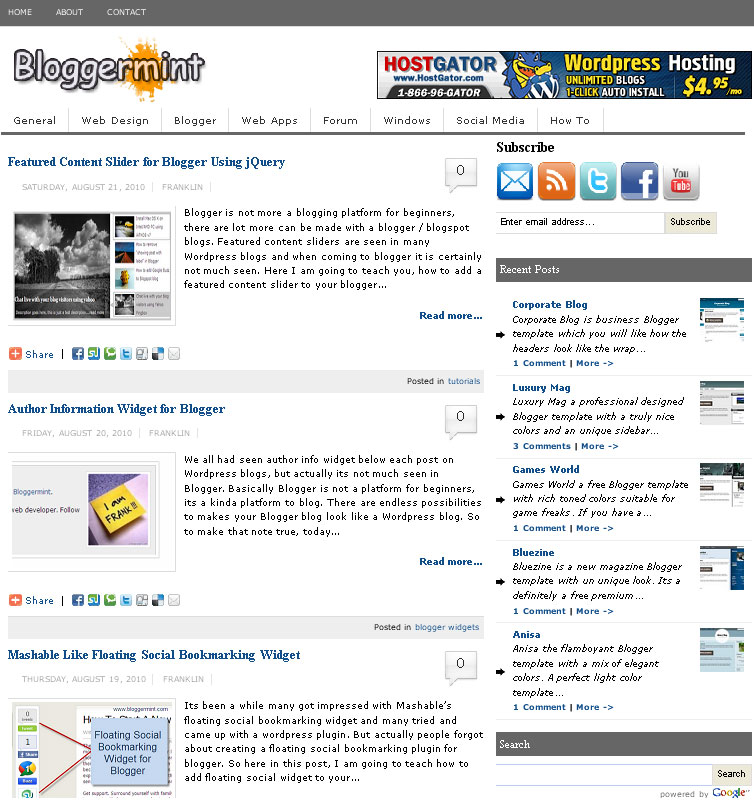
Bloggermint also includes page numbered navigation. The sidebar has the Subscribe option (Facebook, Twitter, RSS, email and YouTube), you can modify the links in Edit Html, just look for the below code -

<h3 style=’margin-bottom:10px;’>Subscribe</h3>

This is followed by Recent Posts with thumbnails widget, default search box, Archives etc. Overall Bloggermint is lovely theme, can be used for a blog/site with multiple topics, professional blog etc.

Download the Bloggermint, a Premium Blogger Template

Gamecraft, the Gaming Blogger Theme edit post

Posted by Bhavika On Wednesday, August 25, 2010 0 comments
After a long time we have a gaming template. Gamecraft is designed by Jinsona Theme and brought to blogger by Cahayabiru.com.
Gamecraft, the Gaming Blogger Theme

Its a 3-column theme which consists an automatic slider, a scroll bar adjacent to it, dual navigation bar and tabber. Let's start with the menu bars, each above and below the header. The first one features a drop-down menu, so you can include all your sections. To activate that, go to Design--Page Elements, click on Edit 'categorymenu' and add the below code -

<li><a href="PARENT-LINK-ADDRESS">PARENT TITLE</a>
<ul class="children">
<li><a href="CHILDREN-LINK-ADDRESS">CHILDREN TITLE</a></li>

<li><a href="SUB-PARENT-LINK-ADDRESS">SUB PARENT TITLE</a>
<ul class="children">
<li><a href="CHILDREN-LINK-ADDRESS">CHILDREN TITLE</a></li>

</ul></li></ul>
</li>

<li><a href="PARENT-LINK-ADDRESS">PARENT TITLE</a>
<ul class="children">
<li><a href="CHILDREN-LINK-ADDRESS">CHILDREN TITLE</a></li>
</ul></li>

Repeat the code marked in bold in case you want to add more categories.

To add links in the second menu bar, go to Design--Page Elements, click on Edit 'frontmenu' and add the following code -

<li><a href='top-menu-link-address-here' title='hover-top-menu'>YOUR-TOP-TITLE</a></li>

Place the relevant links and save the changes. For the main slider, go to Design--Page Elements, click on Edit 'big picture slidearea', add the following code with your links -

<div id="feature-1" class="videoid"><a href="YOUR-POST-LINK"><span class="shade"></span></a><img class="slidim" src="IMAGE-LOCATION-HERE" width="630" height="280" alt="" /></div>
<div id="feature-2" class="videoid"><a href="YOUR-POST-LINK"><span class="shade"></span></a><img class="slidim" src="IMAGE-LOCATION-HERE" width="630" height="280" alt="" /></div>
<div id="feature-3" class="videoid"><a href="YOUR-POST-LINK"><span class="shade"></span></a><img class="slidim" src="IMAGE-LOCATION-HERE" width="630" height="280" alt="" /></div>
<div id="feature-4" class="videoid"><a href="YOUR-POST-LINK"><span class="shade"></span></a><img class="slidim" src="IMAGE-LOCATION-HERE" width="630" height="280" alt="" /></div>
<div id="feature-5" class="videoid"><a href="YOUR-POST-LINK"><span class="shade"></span></a><img class="slidim" src="IMAGE-LOCATION-HERE" width="630" height="280" alt="" /></div>

For the mini automatic slider with images and post description on the right, you need to add another code in Design--Page Elements, edit 'Small picture right tab' -

<li><a class="listab rounded" href="#feature-1"><img class="boximage" src="YOUR-IMAGE-URL" width="100" height="70" alt="" /><h3> TITLE-HERE</h3><p> SHORT-DESCRIPTION-HERE. ... </p></a></li>
<li><a class="listab rounded" href="#feature-2"><img class="boximage" src="YOUR-IMAGE-URL" width="100" height="70" alt="" /><h3> TITLE-HERE</h3><p> SHORT-DESCRIPTION-HERE. ... </p></a></li>
<li><a class="listab rounded" href="#feature-3"><img class="boximage" src="YOUR-IMAGE-URL" width="100" height="70" alt="" /><h3> TITLE-HERE</h3><p> SHORT-DESCRIPTION-HERE. ... </p></a></li>
<li><a class="listab rounded" href="#feature-4"><img class="boximage" src="YOUR-IMAGE-URL" width="100" height="70" alt="" /><h3> TITLE-HERE</h3><p> SHORT-DESCRIPTION-HERE. ... </p></a></li>
<li><a class="listab rounded" href="#feature-5"><img class="boximage" src="YOUR-IMAGE-URL" width="100" height="70" alt="" /><h3> TITLE-HERE</h3><p> SHORT-DESCRIPTION-HERE. ... </p></a></li>

Fill in your links at relevant spots and save the changes. While in the main post area, post details like author, date, comments appear at the end of the post. The sidebar includes a tabber that can be customised. Access Design--Edit Html and search for 'EDIT-ME' and add the links you want to display in the tabber, like Recent Posts, Comments ets.

Gamecraft has a decent layout with nice features, although it can take time to load due to the number of images and javascripts. Another gaming theme you might be interested in is Gamezine Template.

Download the Gamecraft Gaming Blogger Theme

Work-a-holic Blogspot Theme edit post

Posted by Bhavika On Friday, August 20, 2010 2 comments
Work-a-holic is a 3 column theme designed by Graph Paper Press and brought to blogger by Anshul. It primarily focuses on showcasing photos or designs of bloggers, illustrators, designers etc. 

The theme has a minimalistic and neat layout with easy navigation for users. The menu bar is adjacent to the blog title, and the search box is placed on extreme right. You can include a welcome message for your readers, which is above the main post area, and next to it is the Twitter widget showing your latest update. To activate Twitter, go to Design--Edit Html and look for the below code and replace it with your username -

YOUR-TWITTER-USERNAME

The 3-column photo gallery automatically displays image from your post with the headline and labels. Also included in the template are the social bookmarking icons under each post. The right sidebar can be used to display your recent photos or labels.

Work-a-holic also has a 3 column footer, appearing only on the home page, that is completely widgetized. It simply gives you extra space to add more features on your photo blog.   

Download the Work-a-holic Blogspot Theme

Jeans Blogspot Template edit post

Posted by Bhavika On Monday, August 02, 2010 2 comments
Jeans blogger template is designed by Template Mo and converted to blogger by Best Theme. Its a 3-column template that includes summarised posts on home page, sliding gallery and footer space.
Jeans blogger template
The blog title is in the middle of the menu bar on top, on the label of the jeans. Below that there is a broad space to write either an introductory note, a welcome message or anything else.

The main post area is divided into 3 columns to display summaries of each post with a Read More link to the complete article, and on entering the post author name and date stamp shows up after the headline, while the labels and comments come at the end of the post.

An interesting feature of this template is the sliding photo gallery at the bottom, you can add 100x100 image and link it to your post. To activate this feature, go to Edit Html and look for the below code -

<div id='SlideItMoo_items'>
<div class='SlideItMoo_element'>
<a href='#'>

<img alt='css template' src='http://1.bp.blogspot.com/_yPlAAAH9bEo/TFMEvsZVqtI/AAAAAAAAD_c/DWr7U8m-LBg/s1600/templatemo_image_03.jpg'/></a>
</div>

Change the links at the relevant spots and save it. There is a 4-column footer space as well for you to add blogger widgets etc.

Download the Jeans Blog Template

    Recent Templates

    Recent Comments

    Video Guides